Difference between revisions of "How to setup the IDC10 cable"
From IGEP - ISEE Wiki
Manel Caro (talk | contribs) (How to Prepare the IDC10 to DB9 Cable for use it with a USB232 Serial Conversor on IGEPv2-RC Series) |
Davidof1990 (talk | contribs) |
||
| (20 intermediate revisions by 6 users not shown) | |||
| Line 1: | Line 1: | ||
| − | = How to Prepare the IDC10 to DB9 Cable for use it with a USB232 Serial Conversor on IGEPv2-RC Series = | + | = How to Prepare the IDC10 to DB9 Cable for use it with a USB232 Serial Conversor on IGEPv2-RC Series = |
| − | |||
| − | + | == Check your DB9-to-Flat Cable == | |
| − | |||
| − | + | * CAUTION | |
| − | + | The [https://www.isee.biz/store/product/67-igepv2-serial-debug-cable IDC10 to DB9 Cable] looks like a DB9-to-Flat spare Cable from a Personal PC but is different. | |
| − | + | If you have a DB9-to-Flat spare Cable from a Personal PC, you have to consider that it has pin-to pin connection and that this doesn't correspond to the IGEP (J960) serial connector. | |
| − | + | In this case you have to modify your DB9-to-Flat spare Cable in order to use only pins 2,3,5 | |
| + | pin DC9 - pin IGEP (J960) | ||
| + | 2 - 2 | ||
| + | 3 - 3 | ||
| + | 5 - 5 | ||
| − | |||
| + | == Necessary Material == | ||
| + | #IDC10 to DB9 Cable. | ||
| + | #Cutter. | ||
| + | #Scissors.<br> | ||
| + | #'''[https://www.isee.biz/support/downloads/item/igepv2-hardware-reference-manual-2 IGEPv2 Hardware Reference Manual]'''. | ||
| − | + | [[Image:DSC 0164.JPG]] | |
| − | |||
| − | |||
<br> | <br> | ||
| − | + | == Procedure == | |
| + | The first step it's to separate the wires 5 and 6 for it you should start count from the red mark (the red mark it's the first, wire = 1) you should count 5 wires then you should do a cut between wires 5 and 6. | ||
| + | <br> | ||
| − | + | [[Image:DSC 0168.JPG]] | |
| + | <br> | ||
| + | This is the result for the cut between wire 5 and 6. | ||
| − | + | <br> | |
| + | [[Image:DSC 0169.JPG]] | ||
| + | <br> | ||
| − | Now you must cut the unnecessary wires (wires 6 to 10). | + | Now you must cut the unnecessary wires (wires 6 to 10). |
| − | [[Image: | + | [[Image:DSC 0172.JPG]]<br> |
| + | <br> | ||
| + | And the final result. | ||
| − | + | <br> | |
| + | [[Image:DSC 0176.JPG]] | ||
| + | <br> | ||
| − | + | Now you're ready for test the result: | |
| + | <br> | ||
| + | [[Image:DSC 0177.JPG]] | ||
| − | + | <br> | |
| − | |||
| − | |||
| − | |||
| − | |||
| + | == Serial Port Setup == | ||
| + | You can use minicom, putty or several programs for connect to the [[Using serial debug port to communicate|debug serial port]] . | ||
| − | == | + | == Cable Type == |
| + | If your terminal not prints out text check the pinouts of your serial cable. In most cases you need a | ||
| + | [http://logmett.com/index.php?/quick-tips/rs232-cable-pinouts.html 'null modem cable']. | ||
| − | + | [[Category:How to forge]] | |
| + | [[Category:UART]] | ||
Latest revision as of 13:50, 1 July 2015
Contents
How to Prepare the IDC10 to DB9 Cable for use it with a USB232 Serial Conversor on IGEPv2-RC Series
Check your DB9-to-Flat Cable
- CAUTION
The IDC10 to DB9 Cable looks like a DB9-to-Flat spare Cable from a Personal PC but is different.
If you have a DB9-to-Flat spare Cable from a Personal PC, you have to consider that it has pin-to pin connection and that this doesn't correspond to the IGEP (J960) serial connector. In this case you have to modify your DB9-to-Flat spare Cable in order to use only pins 2,3,5
pin DC9 - pin IGEP (J960)
  2    -    2
  3    -    3
  5    -    5
Necessary Material
- IDC10 to DB9 Cable.
- Cutter.
- Scissors.
- IGEPv2 Hardware Reference Manual.
Procedure
The first step it's to separate the wires 5 and 6 for it you should start count from the red mark (the red mark it's the first, wire = 1) you should count 5 wires then you should do a cut between wires 5 and 6.
This is the result for the cut between wire 5 and 6.
Now you must cut the unnecessary wires (wires 6 to 10).
And the final result.
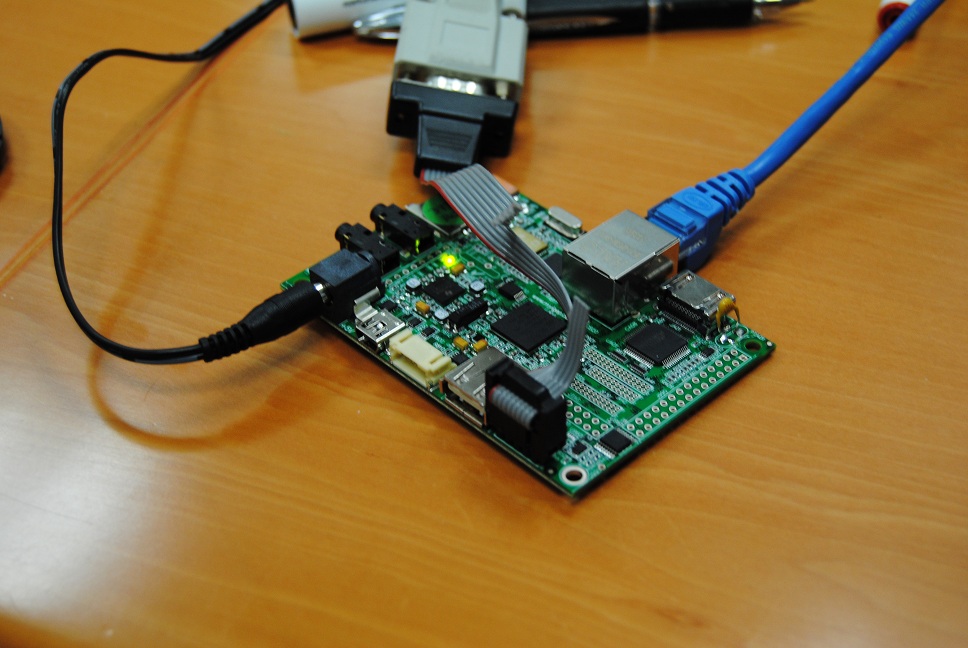
Now you're ready for test the result:
Serial Port Setup
You can use minicom, putty or several programs for connect to the debug serial port .
Cable Type
If your terminal not prints out text check the pinouts of your serial cable. In most cases you need a 'null modem cable'.


