


Difference between revisions of "What can I do with IGEP PARIS"
From IGEP - ISEE Wiki
m (→How to use SW101 button) |
m (→How to use TFT and Touchscreen) |
||
| Line 19: | Line 19: | ||
== How to use TFT and Touchscreen == | == How to use TFT and Touchscreen == | ||
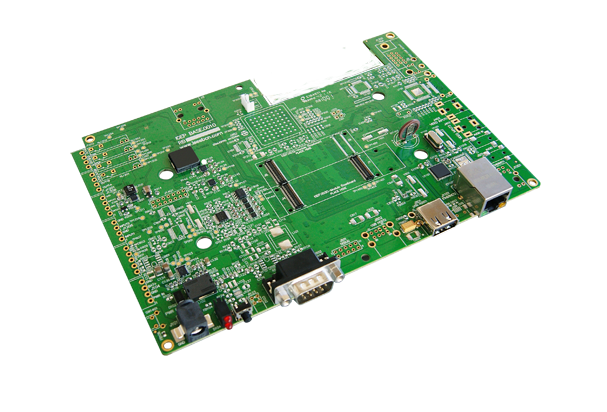
[[Image:berlin_paris_screen_connectors.JPG|right|200px]] IGEP PARIS Expansion supports SEIKO 7” LCD screen. Use J200, J203 and J204 connectors to attach screen. See image for more details. | [[Image:berlin_paris_screen_connectors.JPG|right|200px]] IGEP PARIS Expansion supports SEIKO 7” LCD screen. Use J200, J203 and J204 connectors to attach screen. See image for more details. | ||
| − | Seiko screen is supported by default in IGEP PARIS, | + | Seiko screen is supported by default in IGEP PARIS, but make sure that it is enable using the following steps: |
Edit igep.ini file to configure your touch screen, you can do this [[How_do_I_edit_my_kernel_command_line | adding following kernel cmdline parameter]] | Edit igep.ini file to configure your touch screen, you can do this [[How_do_I_edit_my_kernel_command_line | adding following kernel cmdline parameter]] | ||
Revision as of 18:18, 10 September 2012
|
|
Contents
Overview
This is the 2/3 chapter of IGEP PARIS Expansion Tutorial Guide.
We will learn some basic tasks.
What can I do
You must logged in the board.
How to use TFT and Touchscreen
IGEP PARIS Expansion supports SEIKO 7” LCD screen. Use J200, J203 and J204 connectors to attach screen. See image for more details.
Seiko screen is supported by default in IGEP PARIS, but make sure that it is enable using the following steps:
Edit igep.ini file to configure your touch screen, you can do this adding following kernel cmdline parameter
- Add the following line:
omapdss.def_disp=lcd-70
How to use EEPROM
IGEP PARIS Expansion includes a serial EEPROM, provides 1KB of user data storage. EEPROM is connected through I2C2 of OMAP3 processor at address 0x50.
The following example writes the value 0x22 to register 0x10 of device 0x50 on i2c bus 3:
i2cset -f -y 3 0x51 0x10 0x22
i2cget -f -y 3 0x51 0x10
From How to use EEPROM
How to use serial console

- 115200
- 8N1
- no flow control (either software or hardware)
Open the serial port and the debug shell prompt should appear.
A detailed guide on how to connect via serial debug port can be found by following this link: Using serial debug port to communicate
How to use SW101 button
IGEP PARIS has a button configured like GPIO. You can test it using the following program:
evtest /dev/input/event0
Now press the button and see program traces.
You have successfully completed this chapter of the guide.
|

|
If you have any question, don't ask to ask at the IGEP Community Forum or the IGEP Community Chat | 
|