Using Ethernet to communicate
From IGEP - ISEE Wiki

|
In this guide is used IGEP firmware Yocto |
Contents
Overview
You can log into IGEP via many interfaces, such Serial, Wifi, USB-Ethernet Gadget, etc. In this tutorial we are going to connect to the board via its Ethernet interface. By default, all IGEP Processor boards have a static IP and dynamic IP.
Requirements
There are some requisites to follow this guide:
- IGEP Processor Board with Ethernet
- Host PC
Configure Host PC
Linux
NOTE: You don't need to configure anything if you use IGEP SDK Virtual Machine
If you are running Linux in your PC, open a Terminal session and set the IP of the Ethernet interface in which IGEP is connected (for example eth0):
- In the file /etc/network/interfaces, you should add:
iface eth0 inet dhcp
iface eth0:0 inet static
address 192.168.5.10
netmask 255.255.255.0
- Type in a terminal:
sudo ifup eth0:0
- Revise that:
jdoe@ubuntu ~ $ ifconfig
...
eth0:0    Link encap:Ethernet  HWaddr 08:00:27:ad:0c:ad
          inet addr:192.168.5.10  Bcast:0.0.0.0  Mask:255.255.255.0
          UP BROADCAST RUNNING MULTICAST  MTU:1500  Metric:1
...
Windows and MAC OSX
NOTE: you should use IGEP SDK Virtual Machine but you can use these steps:
Windows:
If you are running Windows in your PC, depending of your OS version and your configuration the steps might be slightly different:
- Click the Start button and select the Control Panel
- Go to Network configuration
- Right click the interface where IGEP is connected (for example: Local Network) and select Propierties
- Select the TCP/IP Internet Protocol configuration and click the Propierties button
- Set a static IP (192.168.5.10) and 255.255.255.0 as network submask
- Close all the dialogs
MAC OSX:
(Please contribute)
Connect to IGEP device
Install Putty
NOTE: You don't need install anything if you use IGEP SDK Virtual Machine.
Now you are ready to log into IGEP via its Ethernet interface. You just need a program with a SSH client.
In this tutorial we are going to use Putty, as it is a multi-platform program.
You can download it from its official page at:
http://www.chiark.greenend.org.uk/~sgtatham/putty/download.html
Install using executable or using apt-get command (in Linux):
sudo apt-get install putty
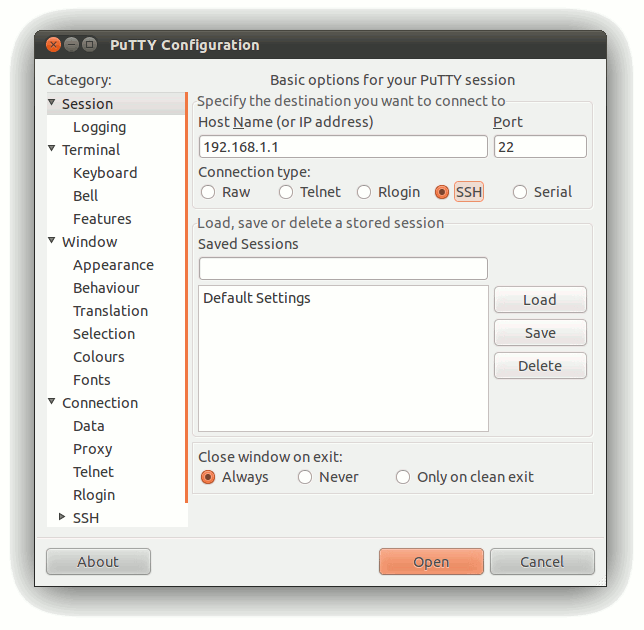
Run Putty
It will look like this:
Follow these steps to connect to IGEP:
- Select the SSH at connection type.
- Insert the IP address of the target (IGEP default IP: 192.168.5.1)
- Ensure that the port is set to 22, the default for SSH communications.
- Finally, press the Open button to start the SSH session.
If everything goes right, you will be able to access to an IGEP console from your PC via Ethernet.
To login IGEP use:
user:root
password: (no password for this user: press return)
Troubleshooting
WARNING: REMOTE HOST IDENTIFICATION HAS CHANGED!
In the case of the SSH client in Linux, a changed host key results in the client refusing to connect and showing an remote host identification has changed error
@@@@@@@@@@@@@@@@@@@@@@@@@@@@@@@@@@@@@@@@@@@@@@@@@@@@@@@@@@@
@    WARNING: REMOTE HOST IDENTIFICATION HAS CHANGED!     @
@@@@@@@@@@@@@@@@@@@@@@@@@@@@@@@@@@@@@@@@@@@@@@@@@@@@@@@@@@@
IT IS POSSIBLE THAT SOMEONE IS DOING SOMETHING NASTY!
Someone could be eavesdropping on you right now (man-in-the-middle attack)!
It is also possible that the RSA host key has just been changed.
The fingerprint for the RSA key sent by the remote host is
8d:0b:29:f0:0a:a1:f5:56:0c:12:18:b0:26:02:6d:9d.
Please contact your system administrator.
Add correct host key in /home/eballetbo/.ssh/known_hosts to get rid of this message.
Offending key in /home/eballetbo/.ssh/known_hosts:57
RSA host key for 192.168.7.1 has changed and you have requested strict checking.
To fix the problem edit your ~/.ssh/known_hosts and remove the line corresponding to this host.


