IGEP SDK Virtual Machine
From IGEP - ISEE Wiki
Contents
[hide]- 1 General information about software used
- 2 Features
- 3 Install Virtual Machine
- 4 Using Virtual Machine
- 5 Other uses:
General information about software used
The IGEP SDK Virtual Machine allows you to boot a custom Linux distribution image using a non-Linux development system. We don't recommend that you use the virtual machine as a day-to-day production development environment. You should limit the virtual machine to testing out and experiencing with the IGEP Technology.
We use a virtual machine (VM) to make an easy way to introduce quickly to a complete development environment for IGEP Technology based devices.
To understand the virtual machine, you need to be familiar with some terms and concepts:
Host Computer: The system on which you are running the virtual machine. For example, the host computer could be your laptop computer running the Windows operating system.
Virtualization infrastructure:
- VirtualBox: An Oracle product that lets you run multiple operating systems at the same time on your PC. It allows you to create isolated virtual machines to try things out. See https://www.virtualbox.org for more information.
- VMware Player: A VMware product that lets you run multiple operating systems at the same time on your PC. It allows you to create isolated virtual machines to try things out. See http://www.vmware.com/products/player for more information.
OVA File: Is a TAR file with the OVF directory inside. The Open Virtual Machine Format file defines the Virtual Machine, including which disk image (vmdk) to use. The disk image contains a Linux distribution build by ISEE. For information on the Open Virtual Machine Format file, see this page.
Features
IGEP SDK Virtual Machine includes Software Development Kit (SDK) from ISEE. All components are installed and configured to speed up getting started with IGEP Technology. It is based in Linux Mint distribution (Ubuntu/Debian variant) with the following features:
Distribution based on:
- Release: Linux Mint 12 (Lisa)
- Edition: Gnome Desktop, x86
Software included:
- IGEP SDK Yocto Toolchain
- Eclipse IDE with Yocto Plug-in and Linux Tools.
- Qt creator IDE
Account information:
- Username: jdoe
- Password: letmein
Network configuration (IP addresses):
- eth0 − assigned via dhcp.
- eth0:0 − static ip address 192.168.5.10
- usb0 − assigned via dhcp.
Install Virtual Machine
This tutorial guide shows the steps for setup the IGEP SDK Virtual Machine (VM) in your computer, which includes a software development kit with all its software completely installed and ready to use.
It also shows how to connect the VM to an IGEP Processor Board, to test your applications directly into your board.
Requirements
- a computer with Linux, Mac or Windows
Download the IGEP SDK Virtual Machine
First of all, download the Virtual Machine:
http://isee.biz/component/zoo/item/igep-virtual-machine-sdk-yocto
You can also download the Virtual Machine manual:
http://isee.biz/component/zoo/item/igep-sdk-software-user-manual
.. or you can:
- Open a web browser and go to www.isee.biz, the main page from ISEE.
- In the product section, go to the page of the product you have, for example, IGEPv2.
- Select the "IGEP SDK Virtual Machine" and downloaded it into your PC.
Install and configure the Virtual Machine
The IGEP SDK Virtual Machine can be used with:
- Virtualbox [1], a multiplatorm application for Linux, Mac or Windows
- VMWare Player [2], which can be downloaded for Windows or Linux.
VirtualBox
Go to file / import ampliance, select the downloaded .ova file and click next.
Continue with the installation, leave the default configuration of the Virtual Machine and finally click to import.
If you edit the default configuration, ensure to set bridge mode to the network adapter
VMWare
Open a new virtual machine and select the .ova downloaded file.
Install additional features to the VM
VirtualBox
If you want to add some functionalities to the virtual machine install the guest additions.
- Select guest additions.
- Run the autorun application.
- Remember that the root user has the password: letmein
VMWare
- At the top of the application, go to Virtual Machine menu and select "Install VMWare tools"
- Select "Download and install"
- Extract the downloaded file
- Open a terminal session and go to the extracted folder.
- Run the vmware-install.pl
- Press return key and continue with the installation at all the installation prompts
When finnishing the installation, restart the VM and you will be able to switch to full screen, copy/paste between OS's, etc.
Using Virtual Machine
Customize your Virtual Machine
Maybe you need more software to develop your applications or do your task.
Graphical procedure
Use “Synaptic Package Manager”, this application is a graphical package management program for apt. It provides the same features as the apt-get command line utility with a GUI front-end based on Gtk+.
Features:- Install, remove and upgrade any packages or whole system.
- Manage package repositories (sources, list).
- Find packages by name, description and several other attributes.
- Browse all available online documentation related to a package.
- Download the latest changelog of a package.
- Lock packages to the current version.
- Force the installation of a specific package version.
- Undo/Redo of selections.
- Built-in terminal emulator for the package manager.
- And select the packages you wish to install.
Command line text procedure
You can also use the “apt” command line program to install and remove software packages from your system (one at a time or many at once), as well as update your system's internal listing of what packages are available from your currently selected list or repositories. Use a terminal to execute apt-get:
- Install a “NameOfPackage” package:
apt-get install NameOfPackage
- Remove a package:
apt-get remove NameOfPackage
- Search for a package:
apt-cache search NameOfPackage
- Update the repository (list of available .deb's):
apt-get update
- Upgrade your system (can be useful in maintaining an up-to-date system):
apt-get upgrade
- To see a short list of common commands:
apt-get --help
Attach removable devices to Virtual Machine
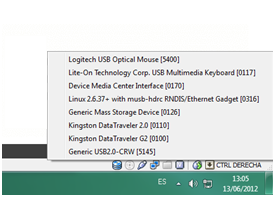
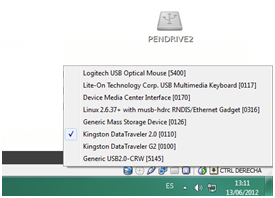
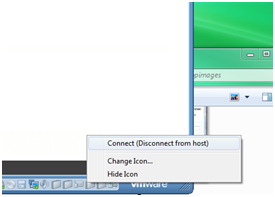
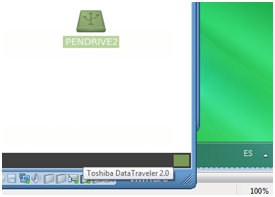
Sometimes you will need to connect some external peripherals to your Virtual Machine like: USB serial converters, SD Card readers, USB Ethernet Gadget, etc. These peripherals can be connected in your native operating system or in your guest operating system.
Connect external peripherals in Virtual Box
|
|
Disconnect from Virtual Machine unsetting your peripheral
Connect external peripherals in VMware Player
|
|
Disconnect from Virtual Machine unsetting your peripheral
Connect your board to the Virtual Machine
In this tutorial we are going to connect IGEPv2 via ethernet to your computer, but you can use other boards and interfaces, such USB-Ethernet Gadget.
First of all, connect IGEPv2 to your computer via the Ethernet interface and power it up.
ASSUMING THE DEFAULT CONFIGURATION of the pre-installed software
In the Virtual Machine, open a terminal session and check that appears a network interface called eth0:0
If it does not mount it, check the connections and reconnect the wired connection of the Virtual machine.
Compile an run and debug a 'C' application using Eclipse IDE
You can use any of the preinstalled IDE's in the IGEP SDK Virtual Machine. The VM has many installed and configured IDE's such Eclipse and Qt creator ready to develop your applications.
In this tutorial, let's try Eclipse IDE and compile one of the available examples.
- Start Eclipse from the Desktop of the VM and open a C application example, such C_Example.
- If you right click the project and select "build project", it will cross compile your project for ARM architecture, suitable to run in your IGEP Processor Board.
- Go to the Run menu and select Run Configurations.
- Select your project and click RUN.
- When the system prompts for a user, use: root and empty password and click OK
At the console tab you will see the remote program execution.
Debugging your applications
You can also debug your applications:
- At the Ecplise menu, select the debug configurations and click Debug.
- Click the Step Over option to debug your source code.
- Close the communication with the stop button.
Other uses:
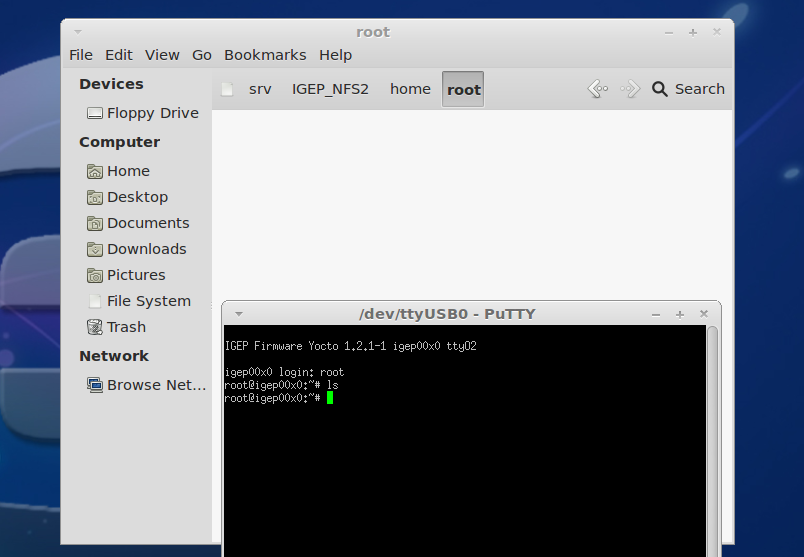
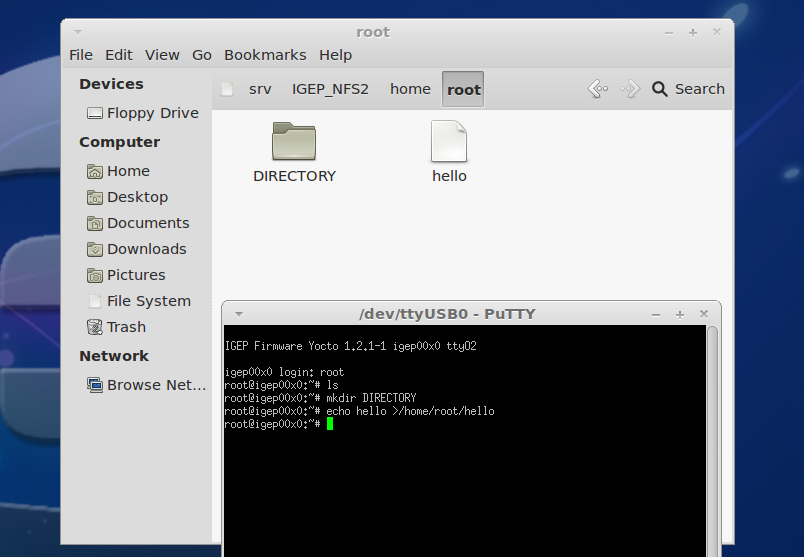
Set up a Network file system
(from Set up a Network File System between IGEP Board and IGEP Virtual Machine)
Network File System (NFS) is a Distributed file system protocol originally developed by Sun Microsystems in 1984, allowing a user on a client Computer to access files over a network in a manner similar to how local storage is accessed. NFS, like many other protocols, builds on the Open Network Computing Remote Procedure Call (ONC RPC) system. The Network File System is an open standard defined in RFCs, allowing anyone to implement the protocol. More information here.
In IGEP Boards, NFS protocol can be used to mount a whole rootfs partition located in a remote disk like Virtual Machine, this method can be useful for:
- Your remote rootfs will not be limited by flash or MicroSD storage.
- You can transfer binaries without using remote connections.
- You can test other rootfs only editing igep.ini configuration file.
Work under NFS environment has its limitation too:
- Remote system is a bit slower than a Micro SD or Flash system
- IGEP X-loader and Kernel will be hosted in Micro SD or Flash
|
|
Click to enlarge image
Develop with Qt under IGEP Technology
(from How to develop with Qt under IGEP Technology)
This guide can be helpful to learnt to develop Qt applications under IGEP Boards. Qt is a cross-platform application framework that is widely used for developing application software with a graphical user interface, and also used for developing non-GUI programs such as command-line tools and consoles for servers. You can get more information here.
Develop with Codeblocks
(from Install and configure Codeblocks for IGEP devices)
Codeblocks is a free and open source, cross-platform IDE which supports multiple compilers including GCC and MSVC. It is developed in C++ using wxWidgets as the GUI toolkit. Using a plugin architecture, its capabilities and features are defined by the provided plugins. Currently, Codeblocks is oriented towards C and C++. It can also be used for creating ARM, AVR, D, DirectX, FLTK, Fortran, GLFW, GLUT, GTK+, Irrlicht, Lightfeather, MATLAB, OGRE, OpenGL, Qt, SDL, SFML, STL, SmartWin and wx programs and applications, although in some cases installing third-party SDKs or frameworks is necessary. More information here.
Codeblocks is not installed by default in IGEP SDK VM, because Eclipse IDE is full integrated with IGEP Firmware. If you don't like Eclipse IDE or you want to use Codeblocks anyway this How-to can be helpful to install, set up and use it.CategoryWork in progress


