


Difference between revisions of "Getting started with IGEP PARIS"
From IGEP - ISEE Wiki
m (→Getting started) |
m (→Requirements) |
||
| Line 15: | Line 15: | ||
In this first chapter, we will learn how to connect some expansion peripherals. | In this first chapter, we will learn how to connect some expansion peripherals. | ||
| − | = Requirements = | + | = Requirements = |
| − | In | + | In this tutorial we are going to use the following peripherals: |
| − | * | + | * IGEP COM MODULE |
| − | *5V DC power supply with a minimum of 3A current capacity | + | * 5V DC power supply with a minimum of 3A current capacity |
| − | * | + | * TFT touch screen Seiko 7" |
| − | * | + | * Network cable |
| − | * | + | * USB keyboard and a mouse (optional) |
| − | *Li-on battery with 3V3 (optional) | + | * Li-on battery with 3V3 (optional) |
| − | * | + | * DB9 connector |
| + | * PC | ||
= Getting started = | = Getting started = | ||
Revision as of 12:21, 14 September 2012
|
|
Contents
Overview
This is the 1/3 chapter of IGEP PARIS Expansion Tutorial Guide.
In this first chapter, we will learn how to connect some expansion peripherals.
Requirements
In this tutorial we are going to use the following peripherals:
- IGEP COM MODULE
- 5V DC power supply with a minimum of 3A current capacity
- TFT touch screen Seiko 7"
- Network cable
- USB keyboard and a mouse (optional)
- Li-on battery with 3V3 (optional)
- DB9 connector
- PC
Getting started
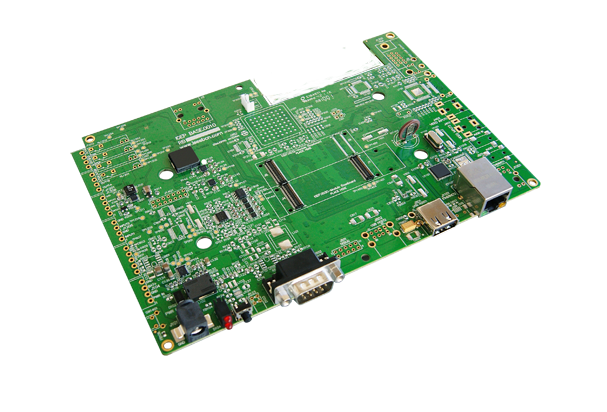
Connect IGEP PARIS Expansion with IGEP COM MODULE/NEUTRON Board

The IGEP PARIS Expansion connects to the IGEP COM MODULE/NEUTRON Board through J1 and J4 connectors. Just take a look on the figure to mount it:
You have successfully completed this chapter of the guide.
|

|
If you have any question, don't ask to ask at the IGEP Community Forum or the IGEP Community Chat | 
|