


Difference between revisions of "What can I do with IGEP COM PROTON"
From IGEP - ISEE Wiki
m (→Handle the gpio-LED's) |
m |
||
| (8 intermediate revisions by 2 users not shown) | |||
| Line 9: | Line 9: | ||
| − | + | = Overview = | |
| + | |||
| + | This is the 2/3 chapter of the Getting Started with IGEP COM PROTON Tutorial Guide. | ||
| + | |||
| + | In this second chapter, we will learn some basics tasks. Upon completion, you will be ready to continue with chapter 3/3 that explains more advanced tasks. | ||
| − | |||
| − | + | __TOC__ | |
| − | |||
= What can I do = | = What can I do = | ||
| + | You must logged in the board. | ||
== Handle the gpio-LED's == | == Handle the gpio-LED's == | ||
| − | + | The board has three leds available that can be controlled. In its simplest form, you can control of LEDs from | |
| − | + | userspace. LEDs appear in /sys/class/leds/ and you can turn on and off with following commands: | |
| + | |||
| + | <pre>$ echo 1 > /sys/devices/platform/leds-gpio/leds/d242\:green/brightness | ||
| + | $ echo 1 > /sys/devices/platform/leds-gpio/leds/d441\:green/brightness | ||
| + | $ echo 1 > /sys/devices/platform/leds-gpio/leds/d442\:green/brightness</pre> | ||
| + | |||
| + | A detailed guide on how use GPIO-LEDS can be found by following this link: [[How to handle the gpio-LED]] | ||
| + | |||
| + | == How to use the SD card == | ||
| + | |||
| + | You can connect a micro SD card for storage. After plugin the SD card the kernel should detect the card and automount in /media directory. | ||
| − | {{ | + | {{Template:Navigation/IGEP Technology Guides/What can I do/Ending}} |
| − | |||
| − | |||
| − | |||
| − | |||
| − | |||
| − | |||
| − | }} | ||
[[Category:IGEP Technology Devices Guides]] | [[Category:IGEP Technology Devices Guides]] | ||
Latest revision as of 12:18, 29 January 2013
|
|
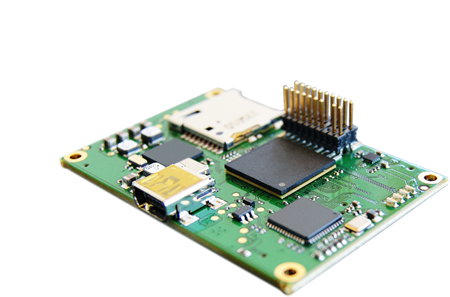
Overview
This is the 2/3 chapter of the Getting Started with IGEP COM PROTON Tutorial Guide.
In this second chapter, we will learn some basics tasks. Upon completion, you will be ready to continue with chapter 3/3 that explains more advanced tasks.
What can I do
You must logged in the board.
Handle the gpio-LED's
The board has three leds available that can be controlled. In its simplest form, you can control of LEDs from userspace. LEDs appear in /sys/class/leds/ and you can turn on and off with following commands:
$ echo 1 > /sys/devices/platform/leds-gpio/leds/d242\:green/brightness
$ echo 1 > /sys/devices/platform/leds-gpio/leds/d441\:green/brightness
$ echo 1 > /sys/devices/platform/leds-gpio/leds/d442\:green/brightness
A detailed guide on how use GPIO-LEDS can be found by following this link: How to handle the gpio-LED
How to use the SD card
You can connect a micro SD card for storage. After plugin the SD card the kernel should detect the card and automount in /media directory.
You have successfully completed this chapter of the guide.
|

|
If you have any question, don't ask to ask at the IGEP Community Forum or the IGEP Community Chat | 
|