


Difference between revisions of "Getting started with IGEP COM PROTON"
From IGEP - ISEE Wiki
m (→Log into IGEP COM PROTON via USB Ethernet Gadget interface) |
m (Undo revision 9376 by Pau pajuelo (Talk)) |
||
| (9 intermediate revisions by 3 users not shown) | |||
| Line 9: | Line 9: | ||
| − | + | = Overview = | |
| + | |||
| + | This is the 1/3 chapter of the Getting Started with IGEP COM PROTON Tutorial Guide. | ||
| + | |||
| + | In this first chapter, we will learn how to connect and log into. | ||
| + | |||
| + | Upon completion, you will be ready to continue with chapter 2/3 that explains more advanced tasks. | ||
| + | |||
| + | We HIGHLY RECOMMEND THAT YOU UPDATE YOUR FIRMWARE IMAGE TO A RECENT RELEASE to ensure you have the latest features and bug fixes. Please see the article on [[IGEP_firmware_Yocto | IGEP YOCTO Firmware]] | ||
| − | |||
| − | + | __TOC__ | |
| − | |||
= Requirements = | = Requirements = | ||
| Line 22: | Line 28: | ||
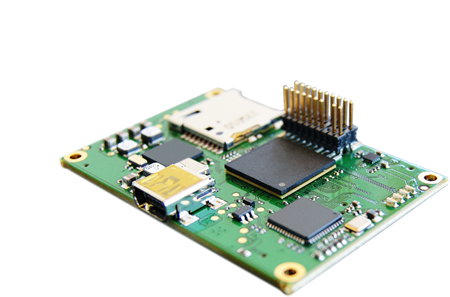
* IGEP COM PROTON | * IGEP COM PROTON | ||
| − | * | + | * USB Standard-A to Mini-B type cable |
| − | * USB | + | * Powered USB HUB 2.0 |
* A PC | * A PC | ||
= Getting started = | = Getting started = | ||
| − | |||
| − | [[Image:IGEP_COM_PROTON_with_HUB.JPG| | + | == Power up == |
| + | |||
| + | The board can be powered though USB OTG connector. It's recommended use an external USB hub. Connect the USB Standard-A to Mini-B type cable between the board and the USB hub. | ||
| + | |||
| + | [[Image:IGEP_COM_PROTON_with_HUB.JPG|center|200px]] | ||
| + | |||
| + | == Booting == | ||
| + | |||
| + | With the board powered, you'll see a few lights flash, after a few seconds may light up a fixed green led. The sequence will be different based on softwre version. | ||
| + | |||
| + | |||
| + | "Under the hood" the bootloader is preparing to load the linux kernel. The linux kernel loads and initializes the hardware and mounts the root file system. Finally, you'll be able access to the board using the USB Ethernet Gadget. | ||
| + | |||
| + | == Remote connection via USB Ethernet Gadget == | ||
| + | |||
| + | {{Message/Information Message|title=|message=If you aren't using a Linux operating system, use [http://labs.isee.biz/index.php/IGEP_SDK_Virtual_Machine IGEP SDK Virtual Machine] to connect to the board}} | ||
| + | |||
| + | In your Host Machine, open a terminal session and connect to the boad using the SSH protocol, | ||
| + | |||
| + | $ ssh root@192.168.7.1 | ||
| + | |||
| + | An empty password for root user should work to access to the shell prompt. | ||
| + | |||
| + | If you're experiencing some problems connecting to the board try with following guide : [[Using USB ethernet gadget to communicate]] | ||
| − | |||
| − | |||
| − | |||
| − | |||
{{Navigation/IGEP Technology Guides/Getting Started/Ending | {{Navigation/IGEP Technology Guides/Getting Started/Ending | ||
|Next_Step={{#lst:Template:Links|IGEP_COM_PROTON_Community_Guides_2}} | |Next_Step={{#lst:Template:Links|IGEP_COM_PROTON_Community_Guides_2}} | ||
| − | |||
| − | |||
| − | |||
| − | |||
| − | |||
| − | |||
| − | |||
| − | |||
| − | |||
}} | }} | ||
[[Category:IGEP Technology Devices Guides]] | [[Category:IGEP Technology Devices Guides]] | ||
Latest revision as of 10:00, 18 October 2013
|
|
Overview
This is the 1/3 chapter of the Getting Started with IGEP COM PROTON Tutorial Guide.
In this first chapter, we will learn how to connect and log into.
Upon completion, you will be ready to continue with chapter 2/3 that explains more advanced tasks.
We HIGHLY RECOMMEND THAT YOU UPDATE YOUR FIRMWARE IMAGE TO A RECENT RELEASE to ensure you have the latest features and bug fixes. Please see the article on IGEP YOCTO Firmware
Contents
Requirements
In this tutorial we are going to use the following peripherals:
- IGEP COM PROTON
- USB Standard-A to Mini-B type cable
- Powered USB HUB 2.0
- A PC
Getting started
Power up
The board can be powered though USB OTG connector. It's recommended use an external USB hub. Connect the USB Standard-A to Mini-B type cable between the board and the USB hub.

Booting
With the board powered, you'll see a few lights flash, after a few seconds may light up a fixed green led. The sequence will be different based on softwre version.
"Under the hood" the bootloader is preparing to load the linux kernel. The linux kernel loads and initializes the hardware and mounts the root file system. Finally, you'll be able access to the board using the USB Ethernet Gadget.
Remote connection via USB Ethernet Gadget

|
If you aren't using a Linux operating system, use IGEP SDK Virtual Machine to connect to the board |
In your Host Machine, open a terminal session and connect to the boad using the SSH protocol,
$ ssh root@192.168.7.1
An empty password for root user should work to access to the shell prompt.
If you're experiencing some problems connecting to the board try with following guide : Using USB ethernet gadget to communicate
You have successfully completed this chapter of the guide.
|

|
If you have any question, don't ask to ask at the IGEP Community Forum or the IGEP Community Chat | 
|