


Getting started with IGEP AQUILA EXPANSION
From IGEP - ISEE Wiki
| |
This is a work in progress article. Help other developers like you in the IGEP Community by improving it! |
| |
| |||||||||
Overview
This is the 1/3 chapter of the Getting Started with IGEP AQUILA EXPANSION Tutorial Guide. In this first chapter, we will learn :
- Connect some peripherals, including monitor and USBs.
- Boot the board and touring the default firmware.
- Connect remotely to the board via Serial interface.
Upon completion, you will be ready to continue with chapter 2/3 that explains more advanced tasks.
Contents
[hide]Requirements
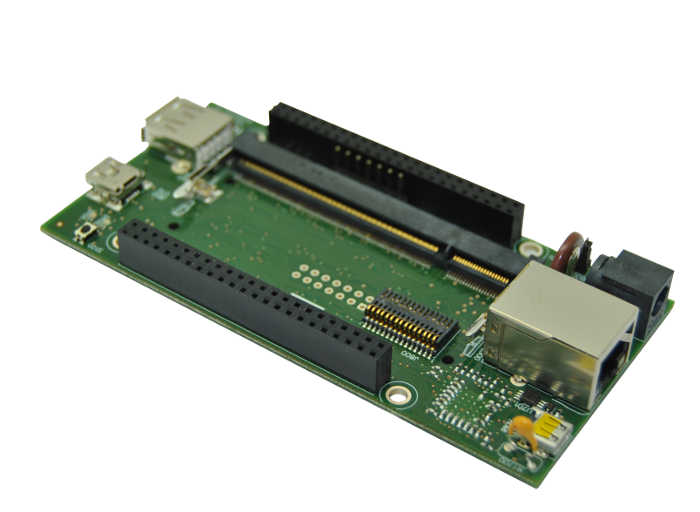
In this tutorial we are going to use the following peripherals:
- IGEP COM AQUILA
- IGEP AQUILA EXPANSION with its power supply
- Monitor compatible with HDMI
- HDMI cable
- Powered USB HUB 2.0
- USB keyboard and a mouse
- Network cable
- PC
Getting started
Monitor
The board will connect to your HDMI monitor. You can use a HDMI cable to connect the board to the monitor. Your monitor should be able to support 720p, which is the default resolution used by the firmware.
Network
You may now plug the Ethernet cable into the 10/100 Ethernet jack of the board to get network access. The default firmware configures the Ethernet device with DHCP protocol.
Keyboard/Mouse
Under construction
Booting
Under construction
<Yocto non X splash image>
Remote connection via Serial interface
You have successfully completed this chapter of the guide.
| |

|
If you have any question, don't ask to ask at the IGEP Community Forum or the IGEP Community Chat | 
|