


What can I do with IGEP COM PROTON
From IGEP - ISEE Wiki
|
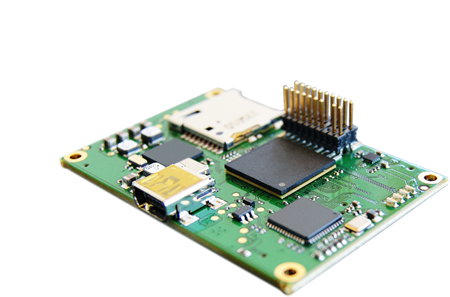
[[Image:{{{Image}}}|100px|center|link={{{Community_MainPage}}}]] {{{Name}}}
|
| What can I do with IGEP0032 |
| If you have successfully completed the first chapter of this guide, you can continue with this tutorial guide about IGEP0032. |
| Overview | ||
 | ||
| 1) Booting up IGEP0032 | ||
| 2) Basic instructions | ||
| 3) Send a file between a PC and IGEP0032 | ||
| 4) Mount a MicroSD card | ||
Booting and setting up
| Pre-installed software |
| By default, all brand new IGEP Processor Boards have a firmware installed on its flash memory.
That means that if you power up your board it will run a Linux distribution provided and installed by ISEE. |
This distribution consists on a minimal Linux-based distribution with a lite X Window System and GNOME Mobile based applications created with Poky Platform Builder.
In the previous chapter of this tutorial, we have booted IGEP0032 with its pre-installed software.
Once the board has booted up, you can log in into IGEP0032 via many interfaces. In the previous chapter of this tutorial we have used the USB Ethernet Gadget and the Wifi interface, but you can use many other interfaces when connecting IGEP0032 to an IGEP Expansion Board.
Boot priority
In fact, IGEP0032 can boot from many other devices (listed by priority):
- from USB
- from UART3
- from a MMC/MicroSD card
- from OneNAND memory
As we haven't set any other boot device rather than the oneNAND (the IGEP0032 flash memory) the system boots from it.
But, as the MicroSD card has an upper priority than the flash, if you plug a MicroSD card (with the right configuration on it) to the MicroSD card reader, IGEP0032 will boot from it and won't boot from the flash memory.
Now, We are going to use this functionality to update your pre-installed software.
Basic instructions
| Overview |
| Learn some Bash basic instructions in Linux (for newbies).
1) Create, edit, move and delete files 2) Run a simple script |
IGEP0032 is compatible with many Linux distributions. In this tutorial we are using Poky Linux, which is the pre-installed software from ISEE.
In case you are not familiar with Bash instructions, here comes some basic instructions to help you startup with the board.
First of all, log in to IGEP0032 with a console from your host PC (via serial port or via SSH), as shown previous sections in this article. Remember the default settings:
login: root
password: (none: press return)
Once you are logged in IGEP0030, run the following commands:
cd /
ls
You have moved to the root directory, that is "/". The instruction "ls" lists all the existing files and directories in the current "path".
Now let's go to the directory /home/root/ with:
cd /home/root/
You can always check at which directory you are with the instruction:
pwd
Most instructions include a 'help' option that can be accessed by inserting the parameter --help. Check out the help page of 'echo' instruction, for example:
echo --help
You can try the instruction by yourself and type:
echo Hello
You have sent the text "Hello" to the standard output, that is the console you are interacting with.
But you can change and 'redirect' the output by using the character '>' :
echo Hello world! > /home/root/name.file
Now notice you have redirected the output to a file called name.file :
ls
You can append any file using '>>' instead of '>'. You can print the content of the file to the standard output:
cat /home/root/name.file
Building a basic script
You can create a script that can run any instruction you want to use in Bash. The main advantage is that you do not have to compile the code, as is auto-interpereted by the system.
We are going to create a basic 'Hello World' script that is going to run the same command you have actually used before:
echo "echo > Hello world!" > /home/root/example.sh
cat example.sh
Now you have created a file called example.sh, but by default it has no execute permissions (x):
ls -la
We are going to add permission to the file by:
chmod a+x example.sh
ls -la
Now you can run the script:
./example.sh
You can edit this file (example.sh) with 'vi', the pre-installed text editor in IGEP0032.
vi example.sh
Press ESC and:
- :q! , to exit without saving
- :w , to save
- :wq , to quit and save
- i , to insert text
Other simple & useful instructions
- mkdir
- rmdir
- find
- grep
You can stop any instruction by pressing CTRL+C
Send a file between a PC and IGEP0032
In a Linux host PC, you can use SCP (secure copy) via SSH to transfer files between IGEP0032 and your host PC.
We are going to use the default settings in IGEP0032 for USB Ethernet Gadget.
Note: This section is assuming you have successfully followed the previous chapters in this tutorial
Now let's transfer a file called original.file from your host PC to the directory /home/root/ in your IGEP0032.
In your Host PC open Terminal and type:
scp -r original.file root@<destination_IP>:/home/root/destination.file
where:
- destination_IP: 192.168.7.2 via USB Ethernet Gadget, 192.168.6.1 via Wifi
You can repeat the process from the IGEP0032 console, and transfer a file from IGEP0032 to your Host PC.
Mount a MicroSD card
(Work in progress section!)
Access to Generic FAT32 microSD
mount -t vfat /dev/mmcblk0 /mnt/tmp/
Access to Generic USB Flash disk
mount -t vfat /dev/sda1 /mnt/tmp/
Safety Remove microSD
umount /mnt/tmp
Access to IGEP demo microSD
mount -t jffs2 /dev/mmcblk0 /mnt/tmp/
You have successfully completed this chapter of the guide.
| |

|
If you have any question, don't ask to ask at the IGEP Community Forum or the IGEP Community Chat | 
|