How to boot from MicroSD Card
From IGEP - ISEE Wiki
Overview
This how to explains how to create a microSD card to boot IGEP boards with software distributions ( yocto, Ubuntu, Debian ...).
Contents
[hide]- 1 Overview
- 1.1 Theory
- 1.2 Prerequisites
- 1.3 ToolChain
- 1.4 Preparing the microSD card
- 1.5 Install GParted
- 1.6 GParted and Creation of Partitions
- 1.7 Boot Partition Structure
- 1.8 X-Loader (MLO) - IGEPv2 - IGEP COM Module - IGEP COM Proton
- 1.9 MLO + uboot - IGEP COM AQUILA, IGEPv5
- 1.10 Kernel
- 1.11 Root File System
- 2 Test your new MicroSD
- 3 Related articles
Theory
OMAP35xx, DM37xx, AM335x, OMAP5, iMX6 processors can boot from a microSD. All IGEP boards use the microSD card as highest boot priority, it means that the processor try to boot from the microsd card before try to boot from other devices such the OneNand, Nand, SSD or eMMC.
Exist some rules to boot from a microSD card.
Texas Instruments Processors
- The microsd card must be content at latest 2 partitions.
- The first one must be primary partition with the boot flag mark and formated using FAT(16 or 32) file system.
- All names used in this partition must be msdos names (applies to OLD OMAP35xx processor).
- The processor must load a first program called MLO, this program must reside in the first partition, this program it's also called x-loader or uboot-spl.
The processor when boot ONLY load and execute the MLO program and ignore all the rest it's the X-loader(MLO) the program responsible to load the next programs such kernel or uboot if you use this last one approach.
Freescale-NXP Processors
- The microsd card must be content at latest 1 partitions.
- The primary partition can be formatted with any filesystem that u-boot can mount.
- The Processor will load the u-boot.imx it include the SPL and u-boot.
After load this u-boot.imx, u-boot will be ready for boot the kernel.
Therefore, we are going to setup a microSD card with these requirements and install a custom software distribution into it.
Prerequisites
- PC with Linux (We use for this how to Ubuntu 16.04 LTS)
- MicroSD Card (4 Gbytes - class 4) or bigger ...
- Tools such, fdisk, mkfs.ext3, mkfs.vfat, gparted ...
- Cross Toolchain included in Ubuntu 16.04 LTS gcc version 4.9.3 (Ubuntu/Linaro 4.9.3-13ubuntu2).
ToolChain
Preparing the microSD card
Open a terminal window and clear your dmesg using:
sudo dmesg -c
Now insert a new microsd card in your PC and then check your dmesg:
dmesg
You should see something like this:
mmc0: new high speed SDHC card at address 0001
mmcblk0: mmc0:0001 00000 3.79 GiB
mmcblk0: unknown partition table
Ensure all in your microsd card it's erased:
$ sudo dd if=/dev/zero of=/dev/mmcblk0 bs=1024 count=1024
[sudo] password for jdoe:
1024+0 records in
1024+0 records out
1048576 bytes (1.0 MB) copied, 0.43556 s, 2.4 MB/s
Install GParted
We will use the gparted program for create the partitions, if you don't have this program installed then you must install it with this command:
sudo apt-get install gparted
GParted and Creation of Partitions
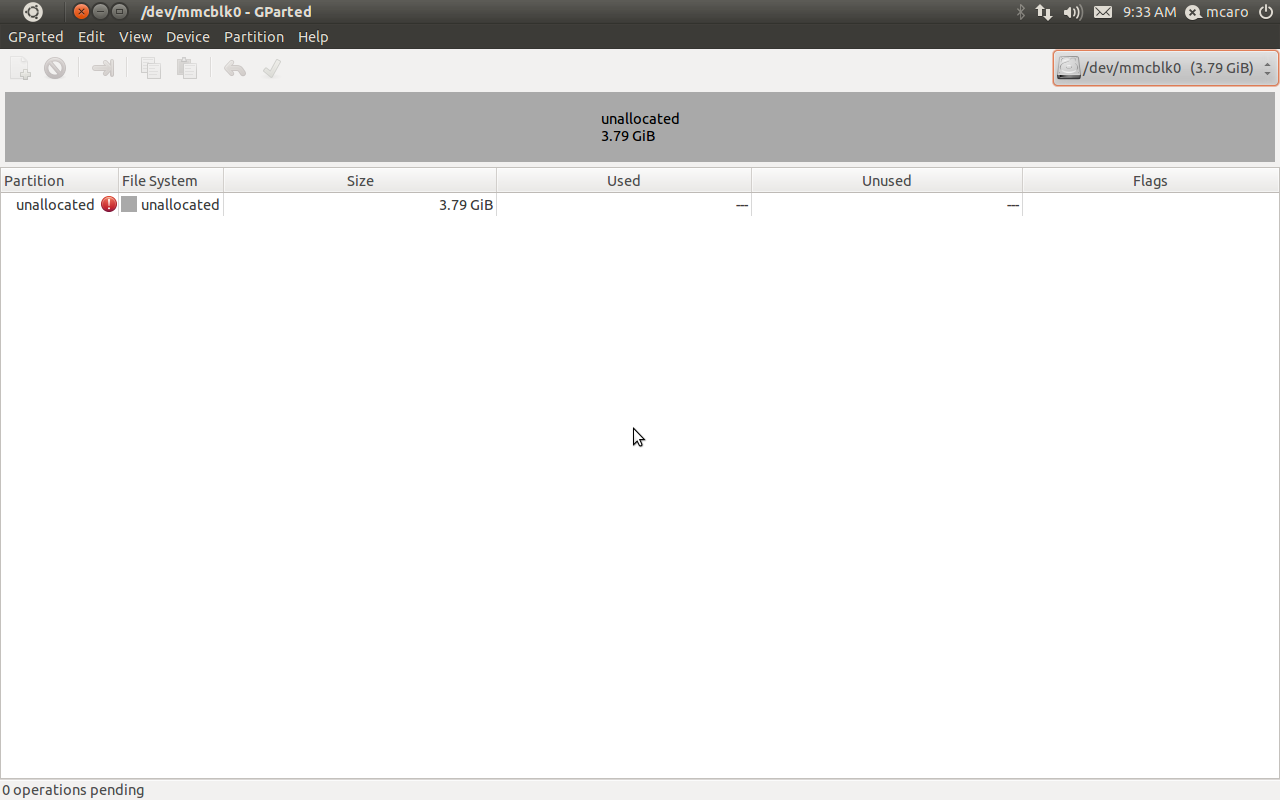
When the install procedure ends you can call the program from your system tools menu or directly using a terminal console.
Create the MSDOS Partition Table
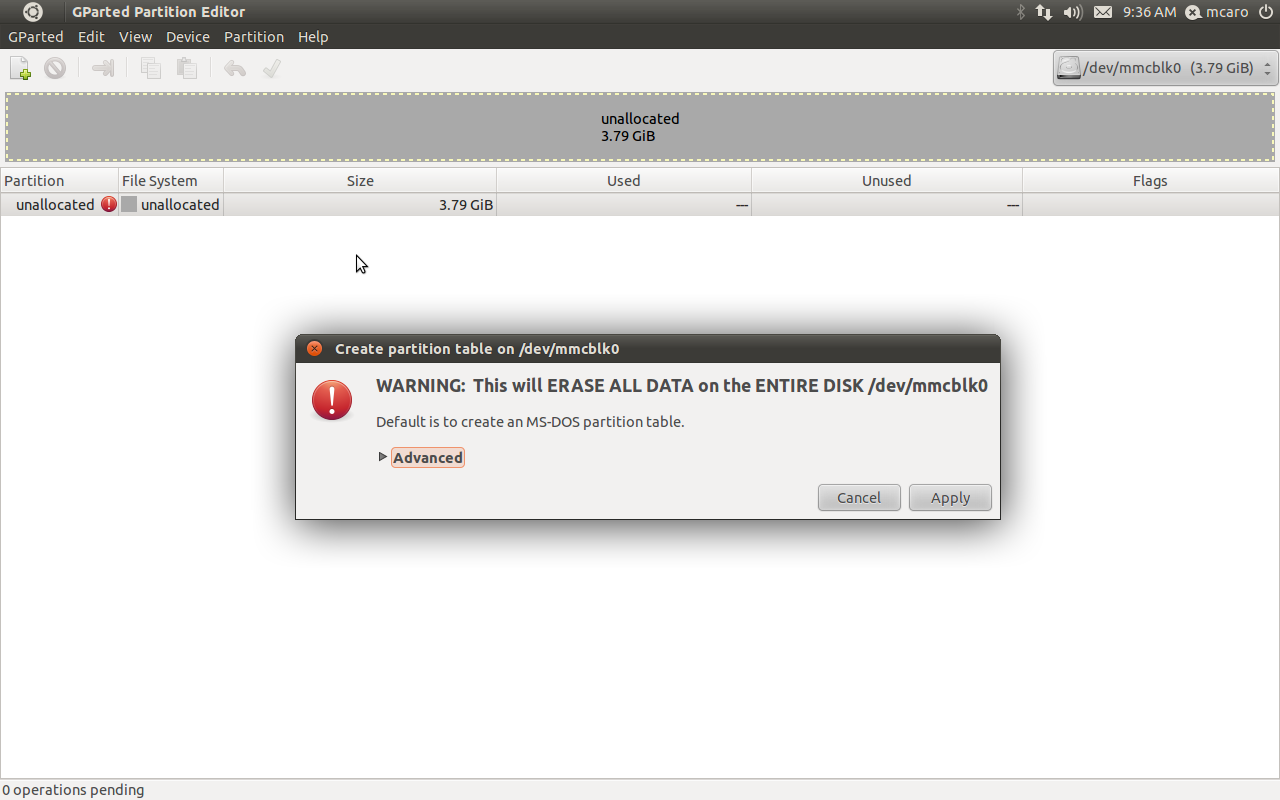
The next step it's create the msdos table partition for it you should click in the "Device" menu and then in the "Create Partition Table" option.
Check the default option it's create a msdos partition table.After that you can Apply.
Create the BOOT Partition - IGEP Texas Instruments Processor based
This Step it's only for OMAP35xx, DM37xx, AM335x, OMAP5432 processor based IGEP boards.
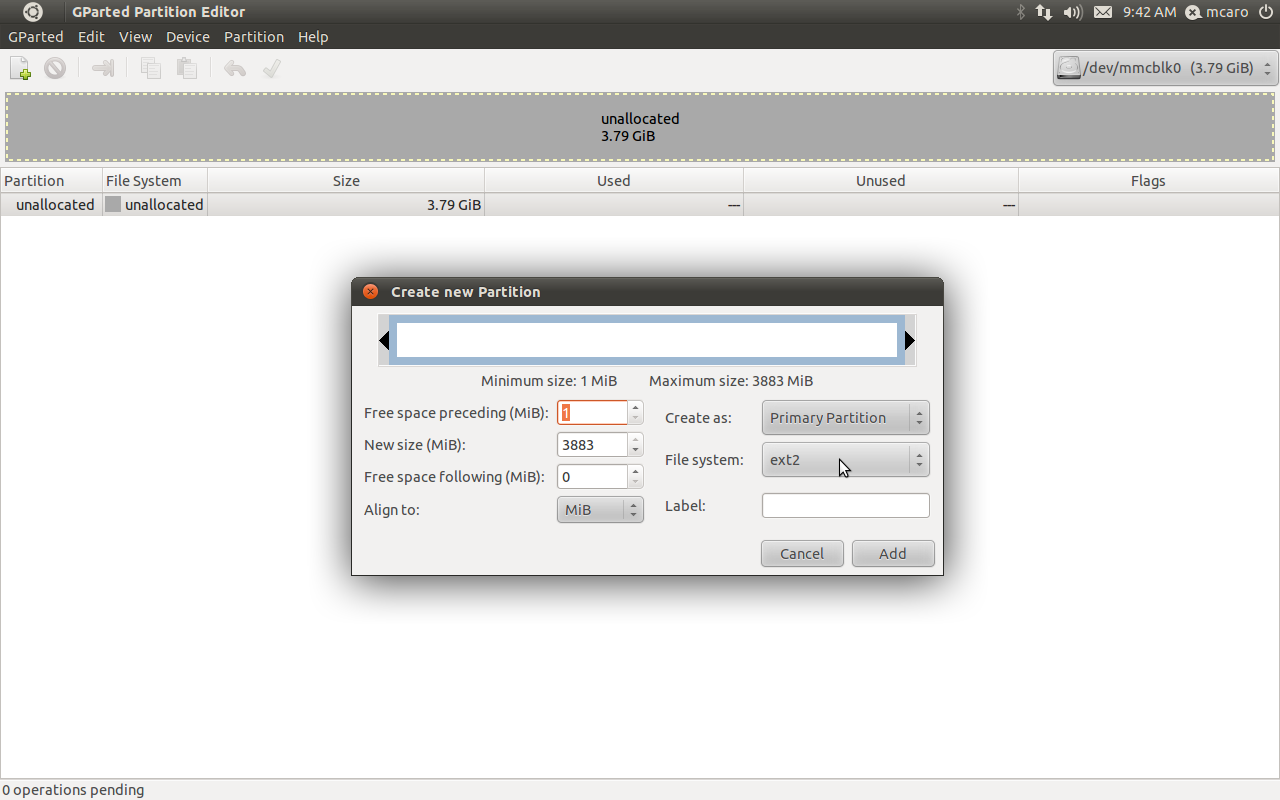
The Next step it's create the partitions for it you should go to the partition menu and select the "New" option then the application show a window like this:
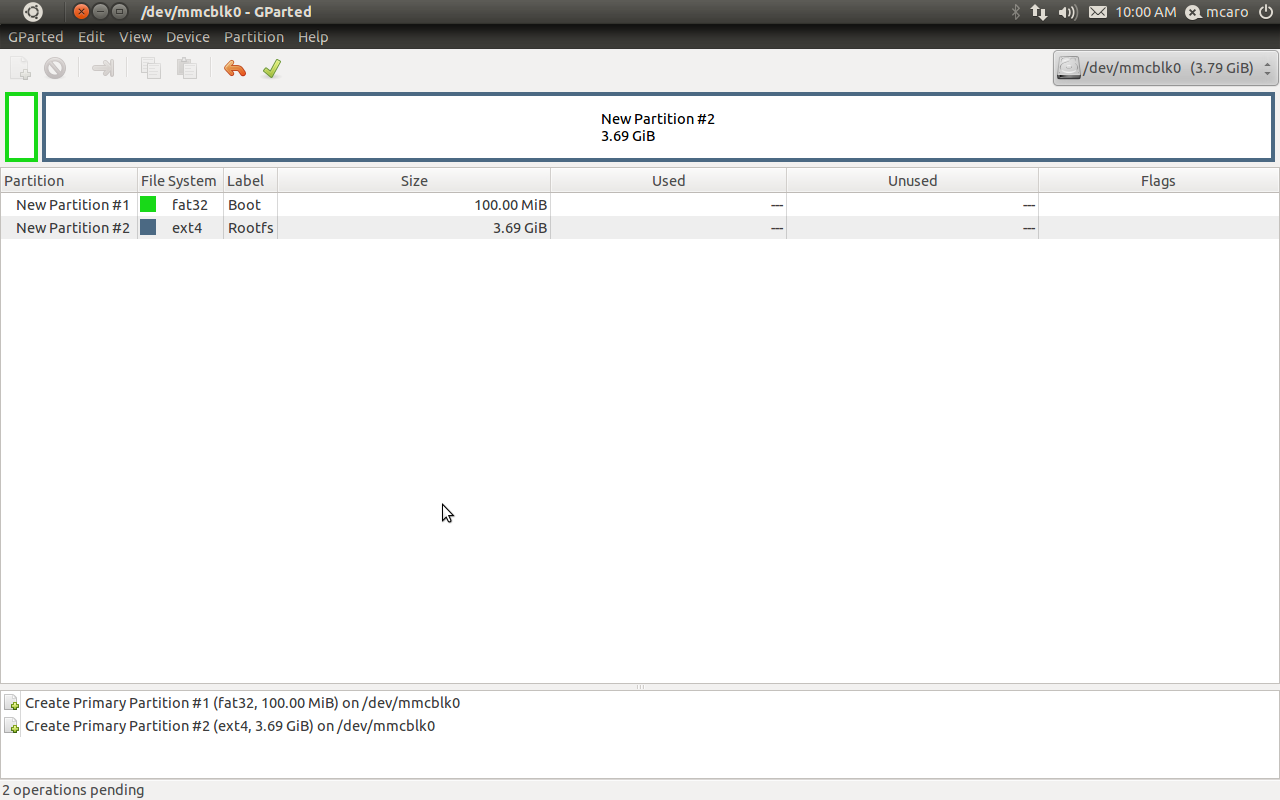
We will configure the partition as:- Primary Partition
- Format: FAT32
- Size: 100 MegaBytes
- Free Space Preceding: 0 MiB
- Label: Boot
- Align to: cylinder
It is recommended to apply changes now or you might get an error later.
Create the BOOT Partition - IGEP NXP-Freescale Processor based
This Step it's only for iMX6 processor based IGEP boards.
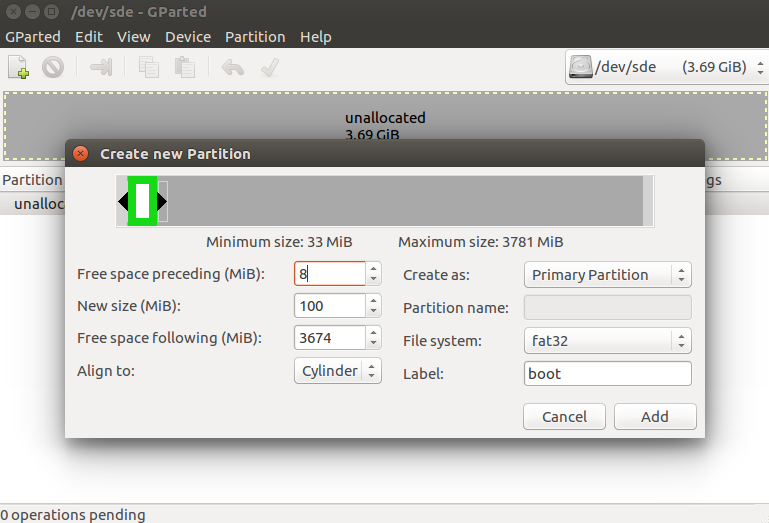
The Next step it's create the partitions for it you should go to the partition menu and select the "New" option then the application show a window like this:
We will configure the partition as:
- Primary Partition
- Format: FAT32
- Free Space Preceding: 8 MiB
- Size: 100 MegaBytes
- Label: Boot
- Align to: cylinder
It is recommended to apply changes now or you might get an error later.
Create the ROOTFS Partition
The Next step it's create the root file system partition.
First you should select the unallocated partition area and then you should go to the partition menu and select the "New" option then the application show a window like this:We will configure the rootfs partition as:
- Primary Partition
- Format: EXT4
- Size: All the Rest
- Label: Rootfs
At end we will click on "Add" button.
Apply all Changes
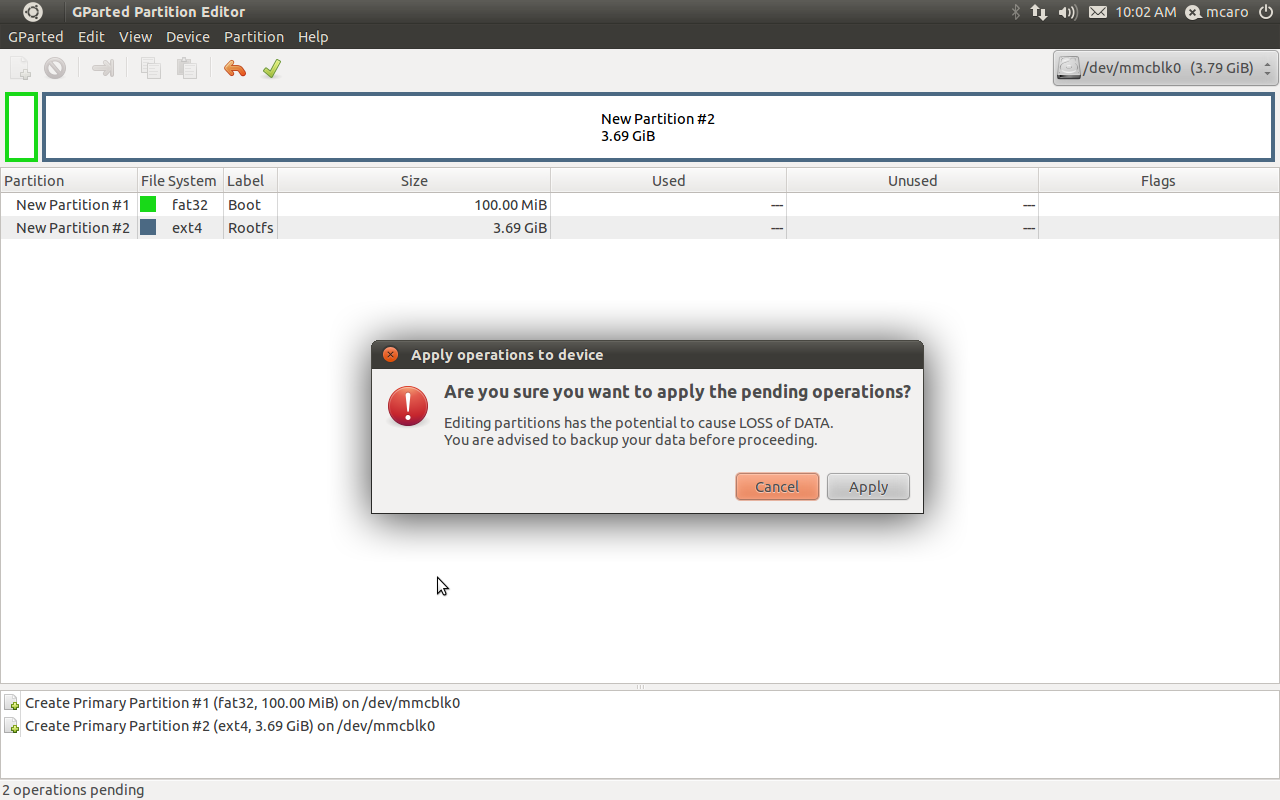
Click on apply button in the main menu after that gparted show a window like this for confirm all operations
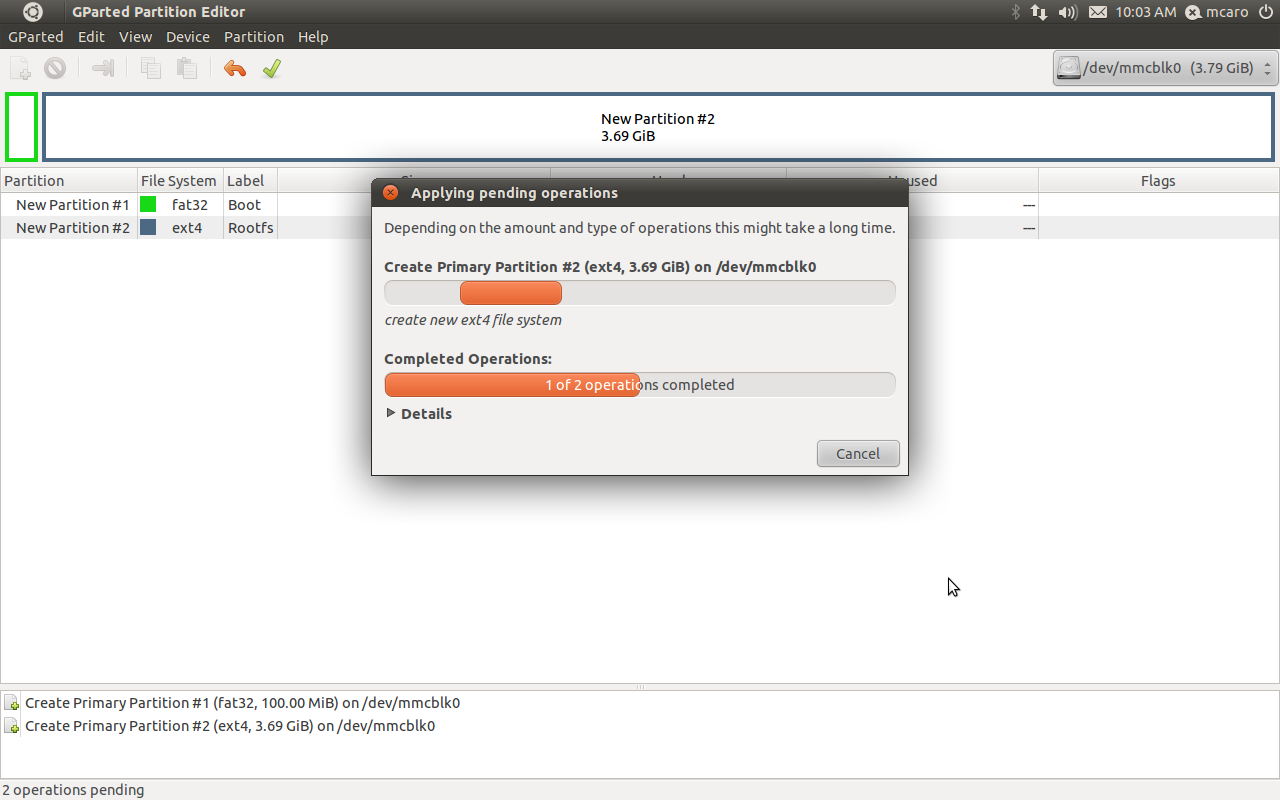
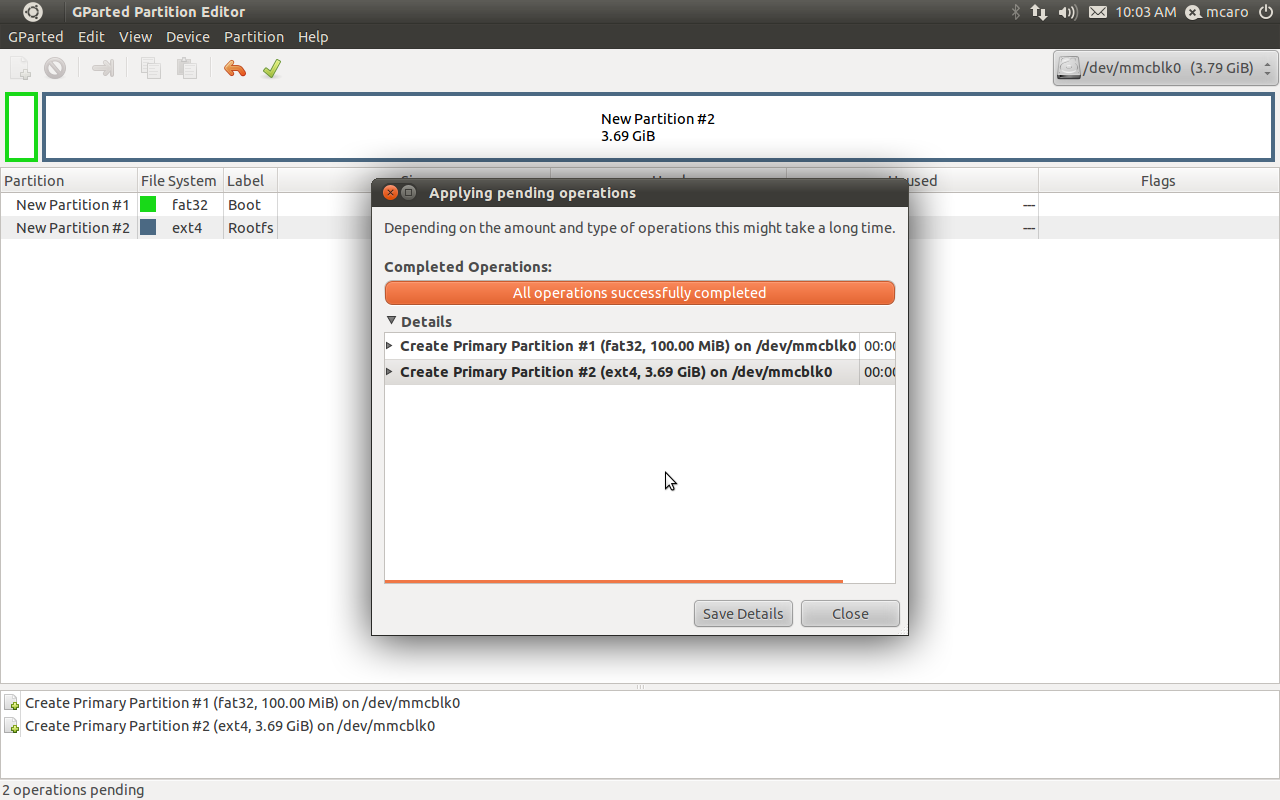
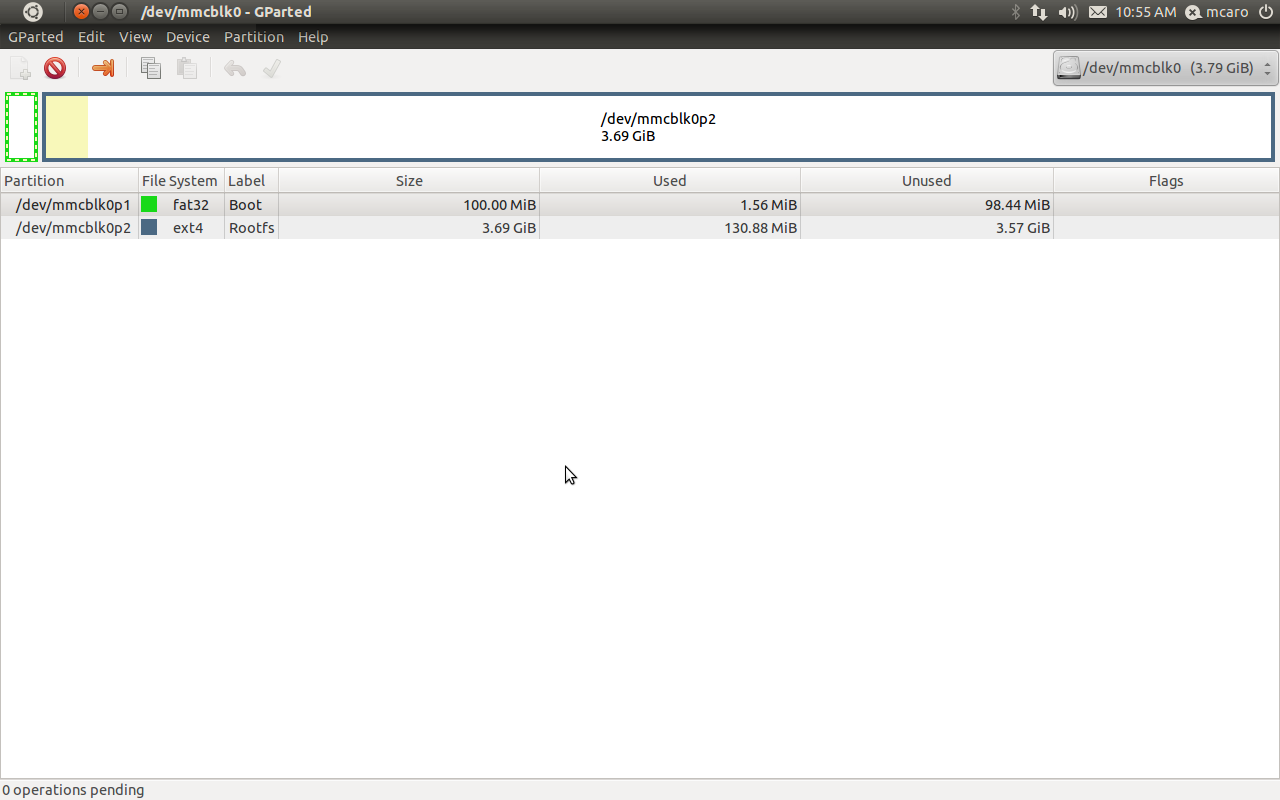
We should click on apply button. When the process finish we can see all changes appliedNow we can see all partitions and configurations done in the main gparted window
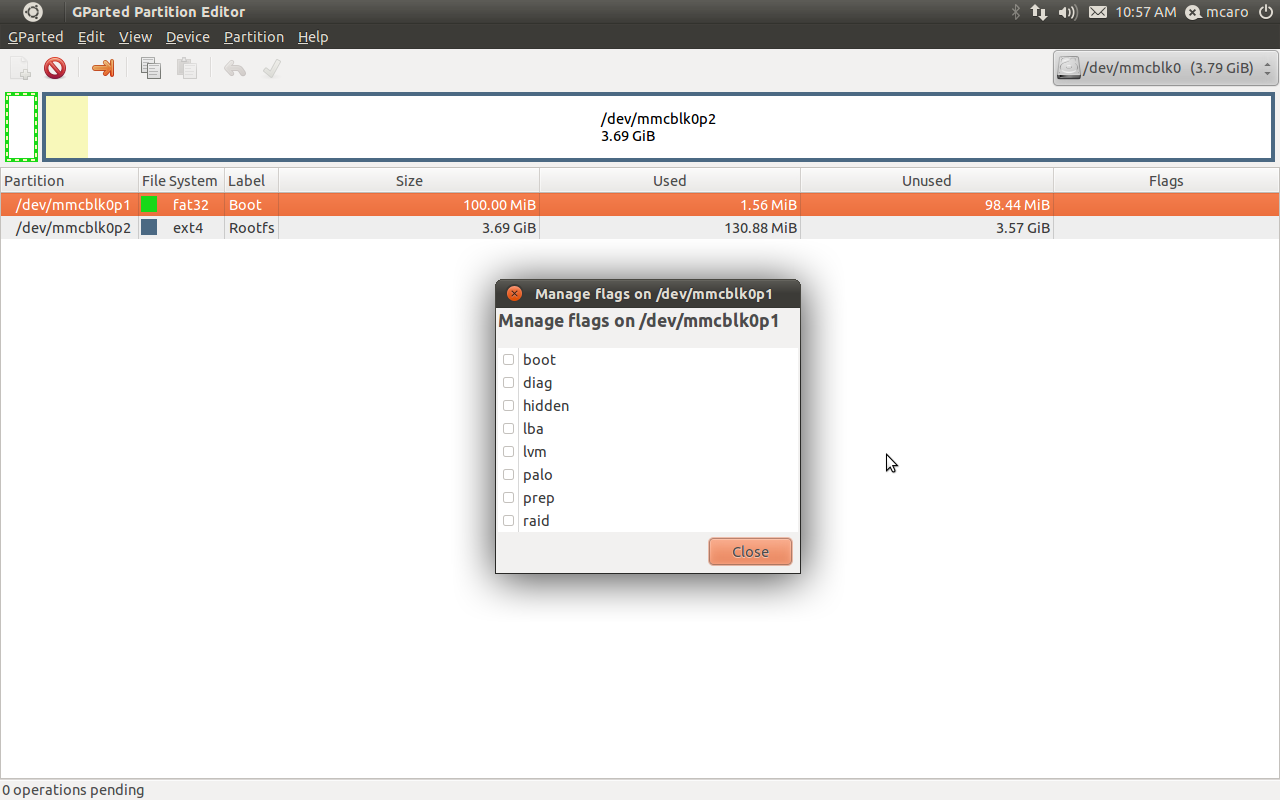
Select "Boot flag" for the boot partition
Now we must select the boot flag for the first partition for it we use the right mouse button over the boot partition and select "Manage Flags" option
Now we have the microsd prepared for copy the boot files
Boot Partition Structure
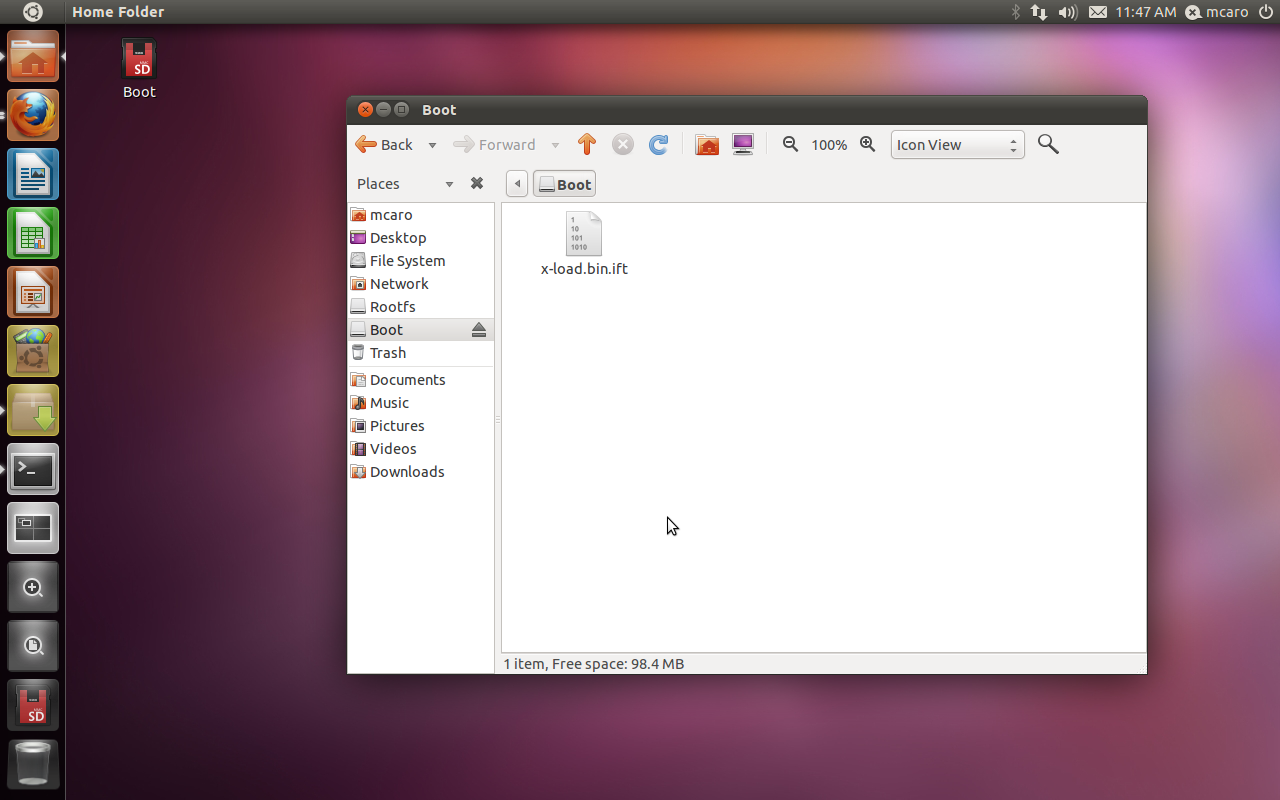
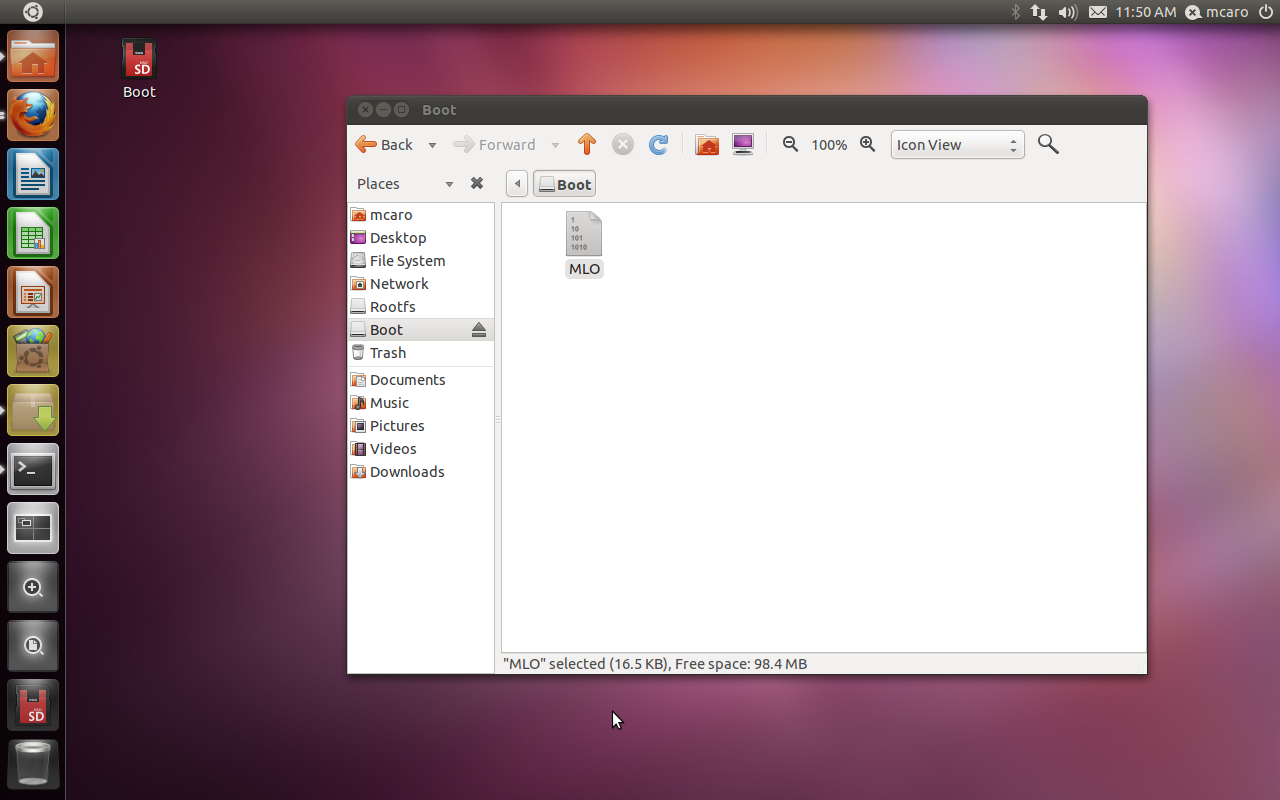
We commented in the theory point the OMAP needs only the MLO (x-loader) file for boot, we will start checking this point.
Before you follow the next points you should mount the microsd boot partition in your host pc.
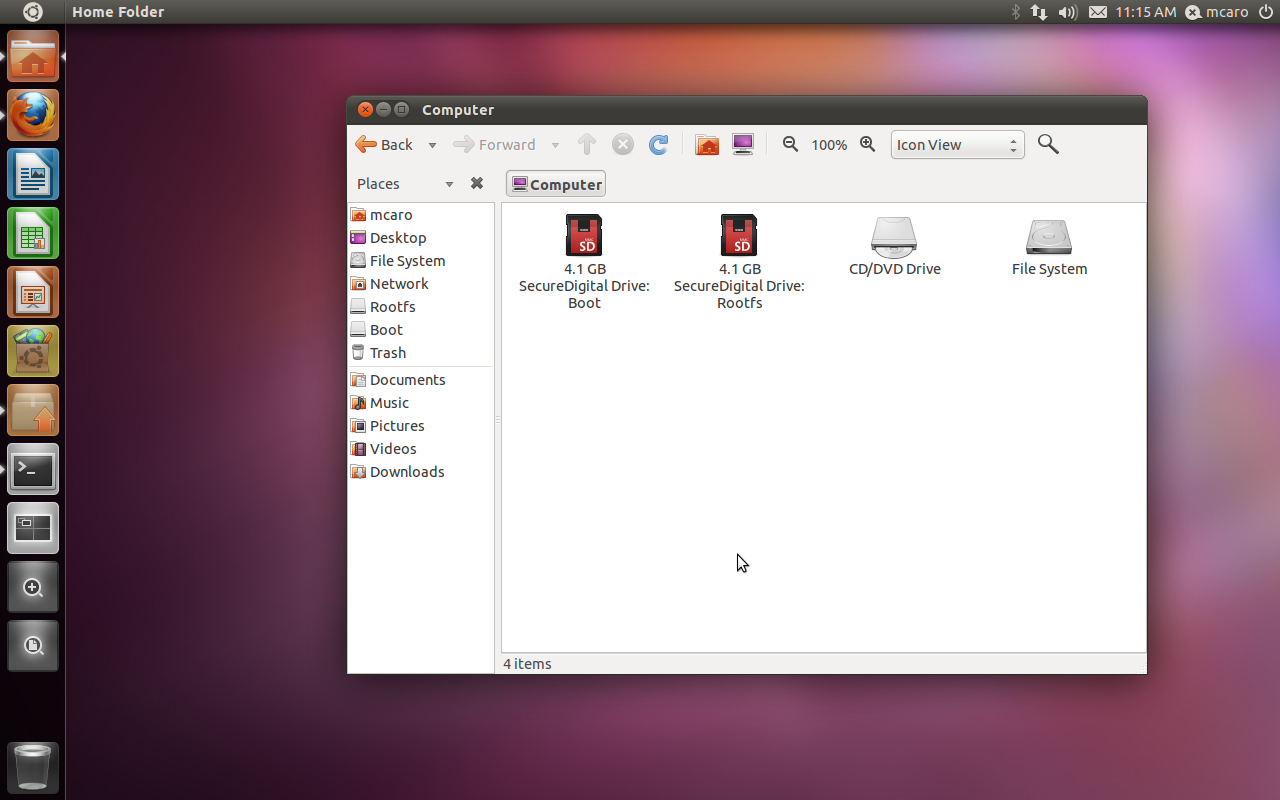
Select the boot partition and mount it in your host.
X-Loader (MLO) - IGEPv2 - IGEP COM Module - IGEP COM Proton
You can follow this other howto about the IGEP-X-loader.
We will compile the sources and get it from our git repository:

$/home/jdoe> git clone git://git.isee.biz/pub/scm/igep-x-loader.git

$/home/jdoe> cd igep-x-loader

$/home/jdoe/igep-x-loader> make igep00x0_config CROSS_COMPILE=<put here your cross compiler>

$/home/jdoe/igep-x-loader> make CROSS_COMPILE=<put here your cross compiler>

Starting from version 2.5 it's not necesary sign the MLO due the build system generate directly the MLO file
if you're using a old version then you must sign it as:

$/home/jdoe/igep-x-loader> contrib/signGP
Alternatively you can download the binary package from here
If you're using 2.5.0.x x-loader copy directly the MLO to your boot partion or if you use older version then follow the next instructions:
Copy the x-loader.bin.ift into the boot partition.
Rename the x-loader.bin.ift to MLO
Now we're ready for test the board boot from the microsd card.
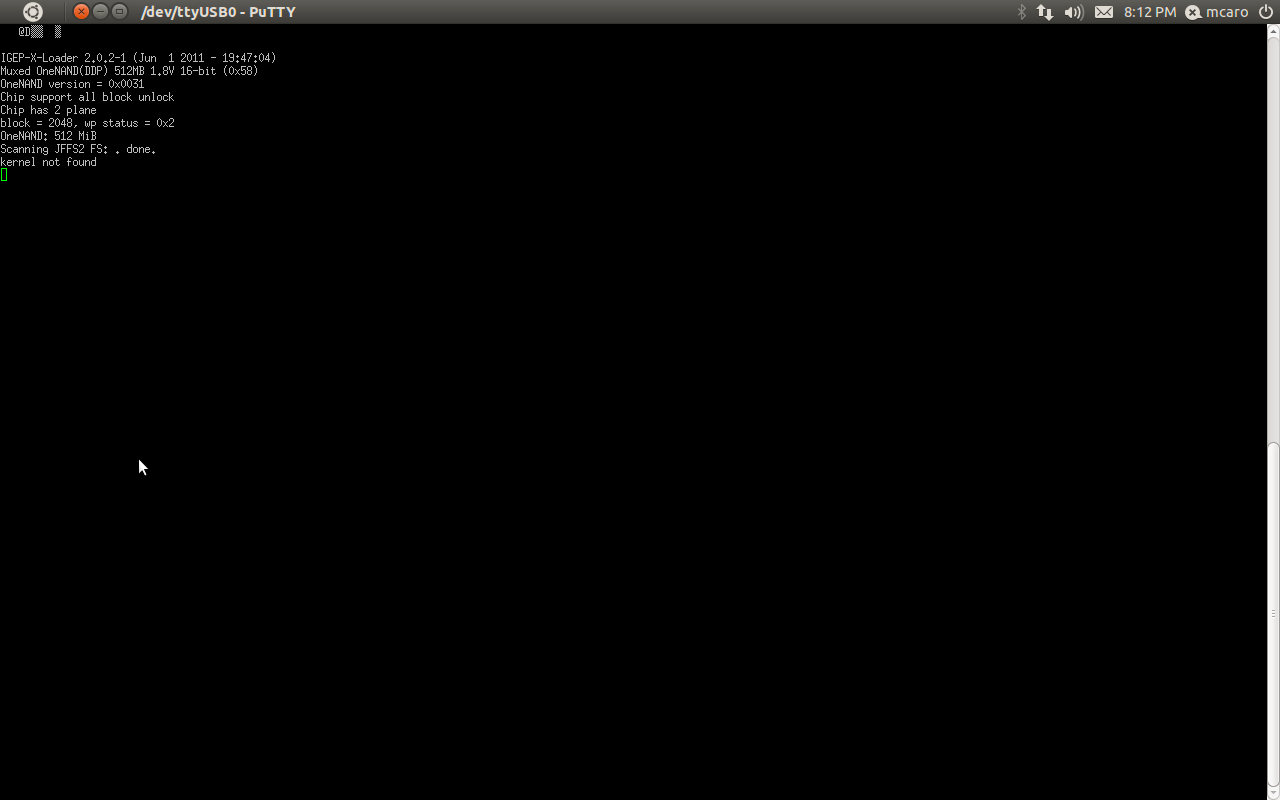
X-Loader Boot
We will eject the boot and rootfs partitions from our Host PC, this step it's a lot important due the Linux must sync all changes before eject the microsd card.
We will insert our microSD card into the IGEP board, connect the serial debug cable and open the serial terminal
Power UP the board.
Configure the IGEP-X-Loader with igep.ini
You can use a file like this:
[kernel]
; Kernel load address, NOT Modify
kaddress=0x80008000
; RAM disk load Address, NOT Modify
;rdaddress=0x84000000
; Board Serial ID
serial.low=00000001
serial.high=00000000
; Board Revision
revision=0003
; Kernel Image Name
kImageName=zImage
; Kernel RAM Disk Image Name
;kRdImageName=initrd.img-2.6.35-1010-linaro-omap
MachineID=xxxx Where Machine ID = 2344 for IGEPv2,  ID = 2717 for IGEP COM Module, ID = 3203 for IGEP COM PROTON
; Mode can be: kernel (boot linux kernel) or binary (boot u-boot, QNX kernel or other binary ARM executable)
Mode=kernel

[kparams]
; buddy parameter selects your expansion board
; buddy = igep0022 (IGEPv2 Expansion board)
; buddy = base0010 (IGEP PARIS or IGEP BERLIN Expansion Board)
; buddy.revision = A or B (Selects Expansion board Revision IGEP Paris or IGEP Berlin only, if you dubt select B)
;buddy=igep0022
;buddy=base0010
;buddy.revision=B
; Setup the Kernel console params
; console= Configure the kernel console (ttyS2 kernel <= 2.6.35 ttyO2 if kernel >= 2.6.37)
;console=ttyS2,115200n8
console=ttyO2,115200n8
; Enable early printk
;earlyprintk=serial,ttyS2,115200
; Setup the Board Memory Configuration
mem=430M
;mem=512M
; Setup the Boot Delay
boot_delay=0
; Setup the ARM Processor Speed
;mpurate=800
; Setup the loglevel
;loglevel=7
; Enable Kernel Debug Output
;debug=1
; Fix RTC Variable
;fixrtc=1
; Configure nocompcache variable
nocompcache=1
; Configure Frame Buffer Configuration
;omapfb.mode=dvi:1280x720MR-16@60
omapfb.mode=dvi:hd720-16@60
; Configure Video Ram assigned
vram=40M
; Configure Video RAM assigned to every frame buffer
omapfb.vram=0:12M,1:16M,2:12M
; Configure frame buffer debug output
;omapfb.debug=1
; Configure DSS Video Debug option
;omapdss.debug=1
; Configure the Board Ethernet Mac Address
smsc911x.mac=0xb2,0xb0,0x14,0xb5,0xcd,0xde
;  --- Configure UBI FS boot ---
;ubi.mtd=2
;root=ubi0:igep0020-rootfs
;rootfstype=ubifs
;  --- Configure NFS boot ---
;ip=192.168.2.123:192.168.2.129:192.168.2.1:255.255.255.0::eth0:
;root=/dev/nfs
;nfsroot=192.168.2.129:/srv/nfs/igep_rootfs
;  --- Configure MMC boot ---
root=/dev/mmcblk0p2 rw rootwait
; Assign Init program
;init=/bin/bash
Create a new file into the boot partition named igep.ini with these content and save the file.
igep.ini is included in the package software inside scripts directory or you can access to it directly in the git with this link
MLO + uboot - IGEP COM AQUILA, IGEPv5
You can find more detailed information about the build procedure on this other howto
git clone git://git.isee.biz/pub/scm/u-boot-arm.git
cd u-boot-arm/
If you're using IGEPv5 board you should checkout this one:
git checkout origin/u-boot-2014.01.y-omap5 -b u-boot-2014.01.y-omap5
make omap5_igep0050_config CROSS_COMPILE=arm-linux-gnueabihf-
Or if you're using IGEP COM Aquila:
git checkout origin/u-boot-2013.07.y -b u-boot-2013.07.y.local
make igep0033_config CROSS_COMPILE=arm-linux-gnueabi-
After configuration you can build it with:
make CROSS_COMPILE=<set here your cross compiler>
After build it generate two files:
MLO and u-boot.img, you must copy both file into your boot partition.
U-boot use self script (enviroment) configuration can be added to boot partition too.
Kernel
You can follow this other howto about how compile and install the Linux Kernel.
We will get from our git repository the kernel sources and build it:
a) Clone the Kernel git repository

$/home/jdoe/> git clone git://git.isee.biz/pub/scm/linux-omap-2.6.git

$/home/jdoe> cd linux-omap-2.6

b) Checkout your desired branch (we used for this howto 2.6.37.y IGEPv2, IGEP COM Module and IGEP COM PROTON)
if you're using IGEP COM Aquila or IGEPv5 you must select your right branch:
IGEPv5: linux-3.8.y-omap5
IGEP COM Aquila: linux-3.8.y-am335x

$/home/jdoe/linux-omap-2.6> git checkout origin/linux-2.6.37.y -b linux-2-6-37.y

c) Configure the kernel (IGEPv2, IGEP COM Module, IGEP COM Proton)

$/home/jdoe/linux-omap-2.6> make ARCH=arm CROSS_COMPILE=arm-linux-gnueabi- igep00x0_defconfig

If you use IGEPv5 or IGEP COM Aquila you should use:

$/home/jdoe/linux-omap-2.6> make ARCH=arm CROSS_COMPILE=arm-linux-gnueabihf- omap2plus_defconfig

d) Build the kernel and Modules (IGEPv2, IGEP COM Module, IGEP COM PROTON)

$/home/jdoe/linux-omap-2.6> make ARCH=arm CROSS_COMPILE=arm-linux-gnueabi- zImage modules

e) Build the kernel, modules and dtbs (IGEPv5, IGEP COM Aquila)

$/home/jdoe/linux-omap-2.6> make ARCH=arm CROSS_COMPILE=arm-linux-gnueabihf- zImage modules dtbs
Notes: The kernel binary resides inside the directory: $/home/jdoe/linux-omap-2.6/arch/arm/boot/zImage
Notes: Alternatively you can download the kernel binary from this link and modules from this.
Notes: You can download directly all releases using this link
Notes: Kernel 3.8.y use dtb file for describe the board configuration, these files resides inside the directory: $/home/jdoe/linux-omap-2.6/arch/arm/boot/dtbs/ and you must copy the right dtb for your board.
Root File System
In this tutorial we will use the linaro headless (soft floating) image as rootfs but you can use your favorite rootfs also.

|
Here there are many articles about how to get many other software distributions. |
Here you've the linaro nano 11.09 (soft floating) available for download from the ISEE server.
Notes: You must build your programs with the hard floating if your rootfs is build with it.
Notes: IGEPv5 must use Hard floating Rootfs
Create the Rootfs mount point
Go to /media directory and create one sub-folder called "binary"
$ cd /media

$ sudo mkdir binary
Mount the RootFS partition
Mount the rootfs partition using the 'binary' directory
$ media > sudo mount /dev/mmcblkp2 /media/binary
Untar the rootfs package
Copy "linaro-m-headless-tar-20101108-2.tar.gz" file inside the /media directory and untar the file
$ media > sudo tar xvfz linaro-m-headless-tar-20101108-2.tar.gz
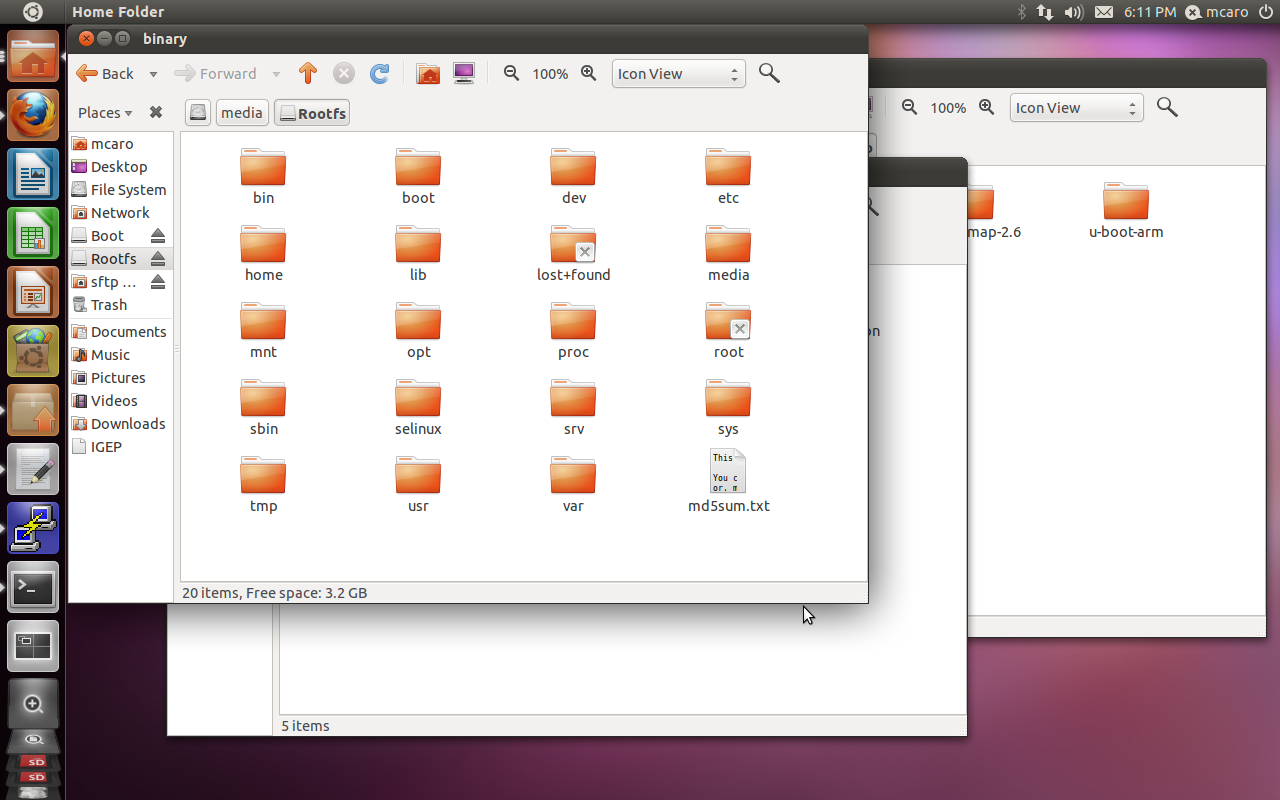
Now you should see inside your rootfs partition a similar structure like this.
Install the kernel modules
Now you should install your kernel modules inside your root file system.
$ media > cd /home/jdoe/linux-omap-2.6

$ /home/jdoe/linux-omap-2.6> sudo make ARCH=arm CROSS_COMPILE=arm-linux-gnueabi- modules_install INSTALL_MOD_PATH=/media/binary
Alternatively if you downloaded the binary package uncompress it inside the directory /media/binary
Install the kernel Image
Just copy the zImage inside your boot partition, remember before that you must mount your mmc boot partition.
$ /home/jdoe/linux-omap-2.6> sudo cp arch/arm/boot/zImage /media/boot/
if you're using dtb kernel as 3.8.y you must copy the dtb too.
$ /home/jdoe/linuz-omap-2.6> sudo cp arch/arm/boot/dtbs/omap5-igep0050.dtb /media/boot
After that you can unmount the boot & rootfs partitions.
Now we're ready for test our new microsd card
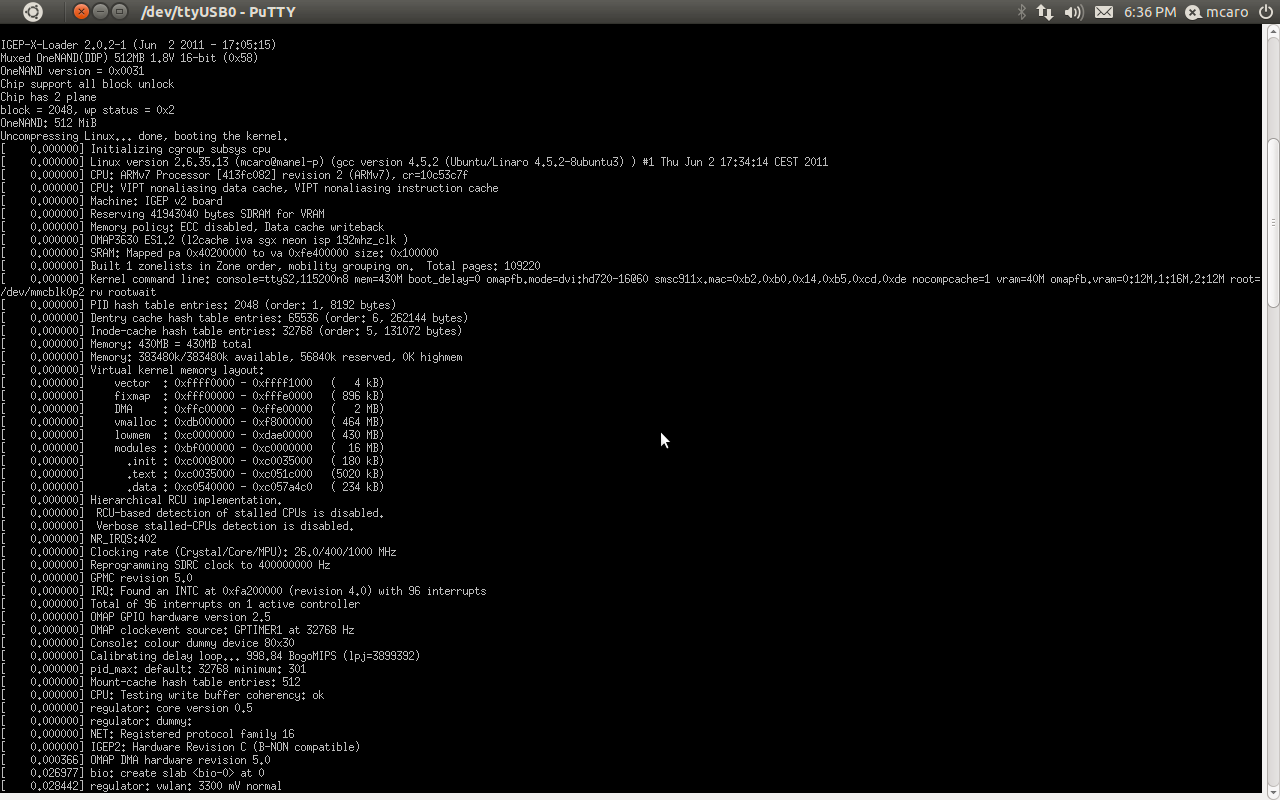
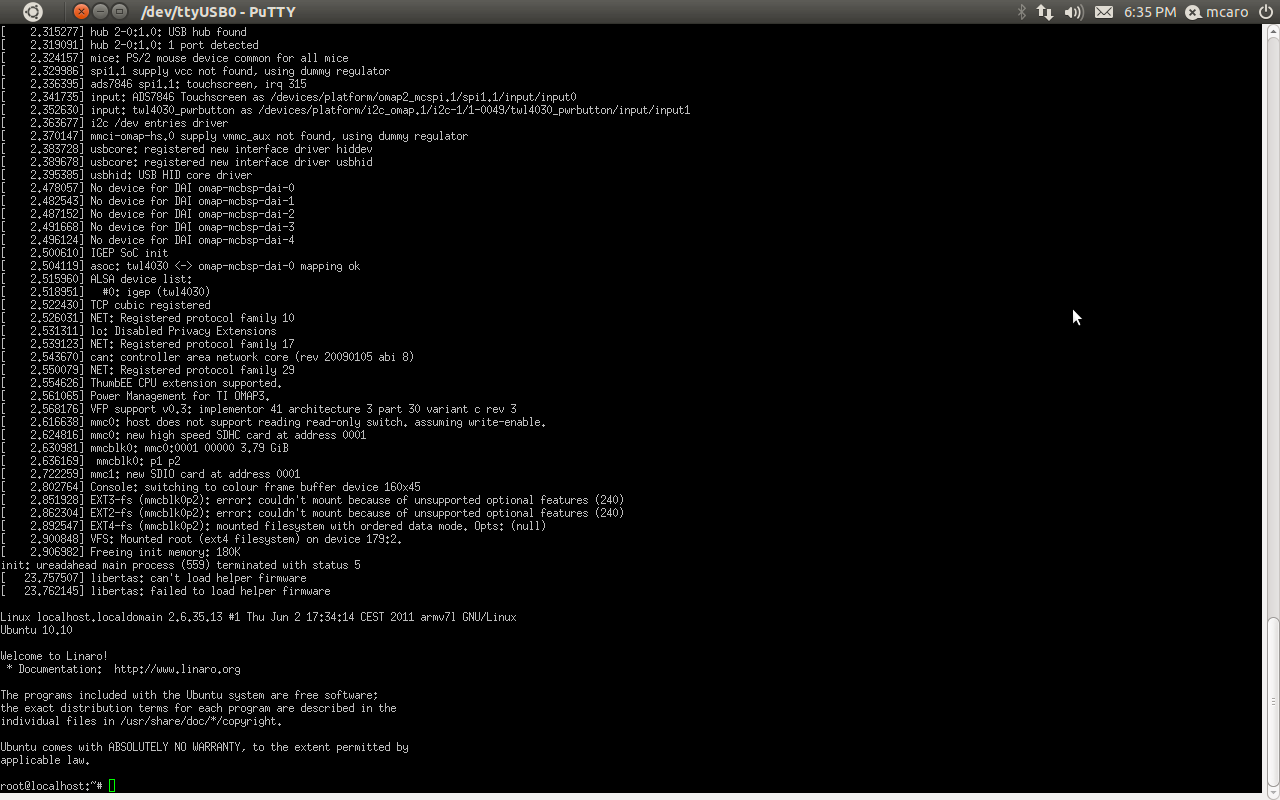
Test your new MicroSD
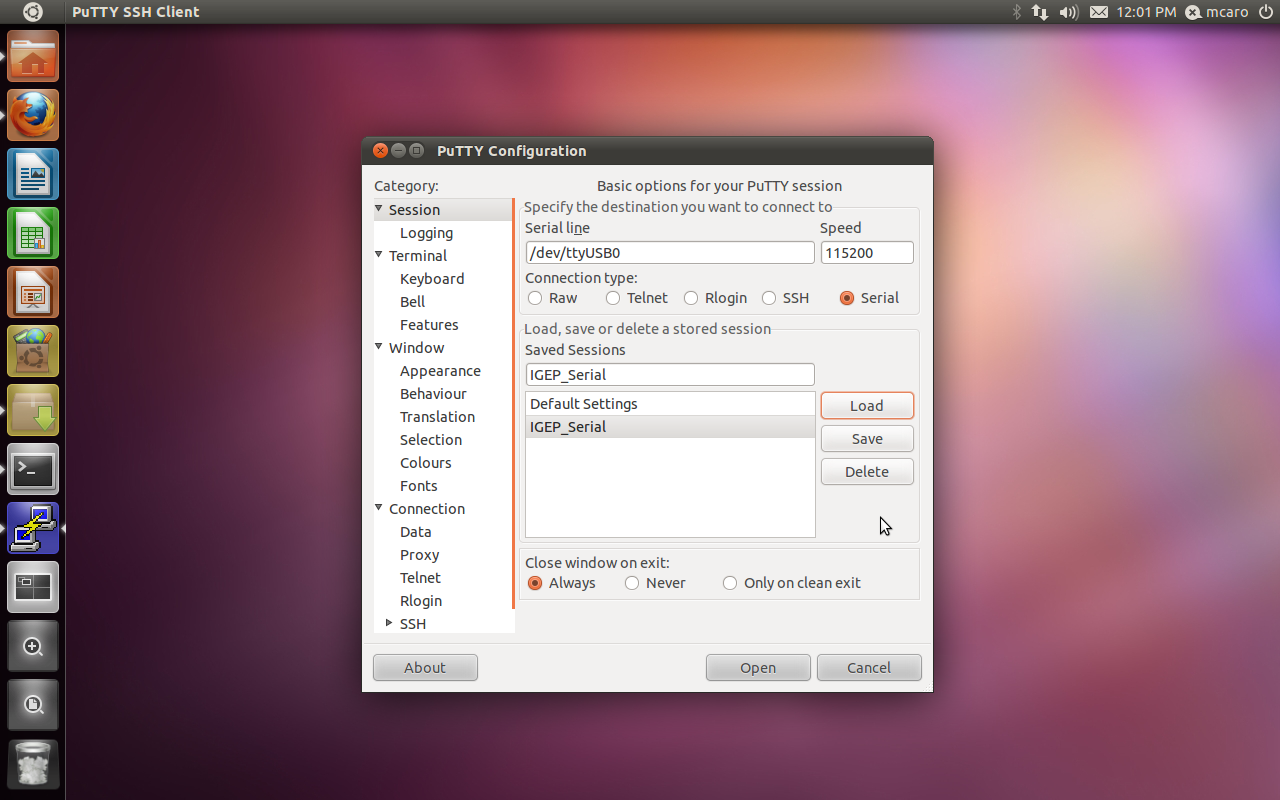
You can test your new microSD card with a Serial client such as PuTTy. Here is an explanation about how to configure it.
(Note that speed should be configured to 115200 bauds).
If you already have configured it or you are using another Serial client and you have connected the Serial cable to the IGEPv2 board, then you are ready to test your microSD.
Insert the microSD in your IGEPv2 board and power up the board.
Related articles

|
If you have any question, don't ask to ask at the IGEP Community Forum or the IGEP Community Chat | 
|


