Difference between revisions of "QEMU"
From IGEP - ISEE Wiki
Manel Caro (talk | contribs) |
Manel Caro (talk | contribs) |
||
| Line 51: | Line 51: | ||
Parameters:<br> | Parameters:<br> | ||
| − | -m : Memory assigned to the Virtualized board in Mega Bytes. | + | -m : Memory assigned to the Virtualized board in Mega Bytes. |
| − | == Tips == | + | == Tips == |
=== Resize Rootfs Partition === | === Resize Rootfs Partition === | ||
| Line 61: | Line 61: | ||
First we create a new raw file using qemu-img as: | First we create a new raw file using qemu-img as: | ||
<pre>$ qemu-img create -f raw addon.raw 1G </pre> | <pre>$ qemu-img create -f raw addon.raw 1G </pre> | ||
| − | With addon.raw we | + | With addon.raw we concatenate it at end of our image file as: |
<pre>$ cat addon.raw >> igep-nano.img </pre> | <pre>$ cat addon.raw >> igep-nano.img </pre> | ||
| − | Next step it's modify the partition table information. We will use cfdisk | + | Next step it's modify the partition table information. We will use cfdisk utility for modify the information. |
<pre>$ sudo cfdisk igep-nano.img </pre> | <pre>$ sudo cfdisk igep-nano.img </pre> | ||
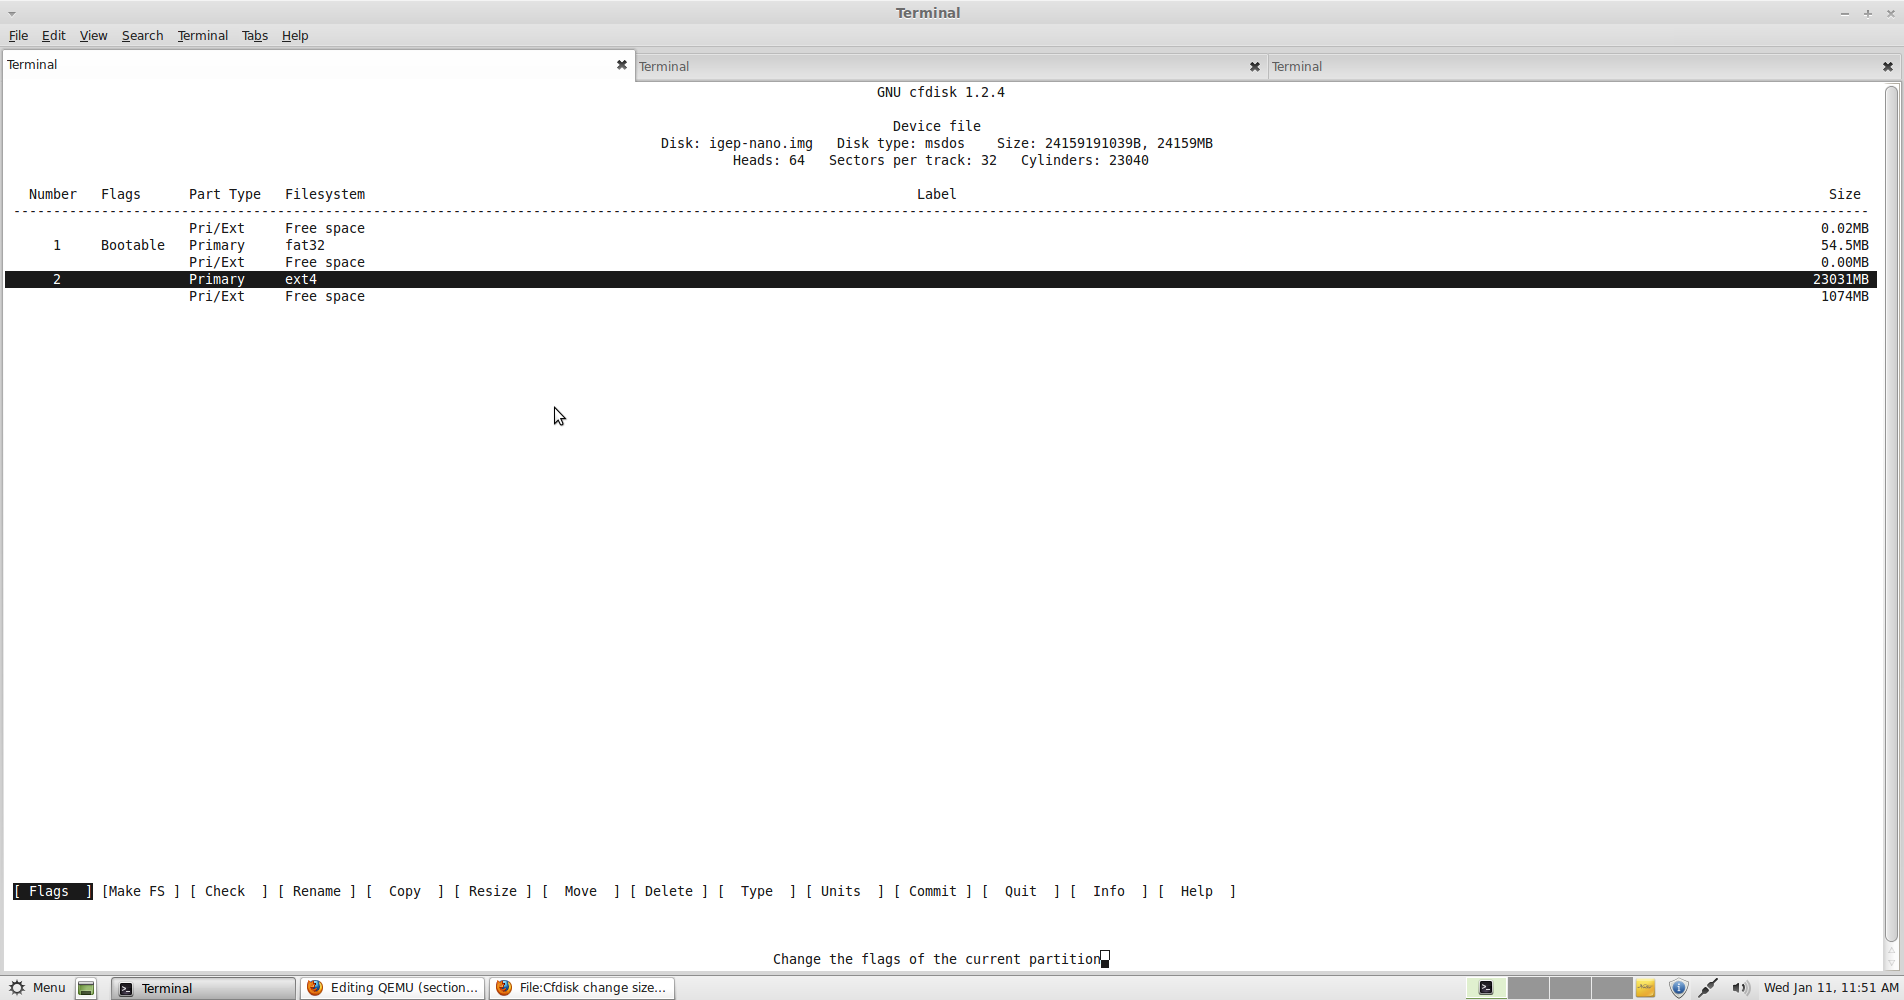
Next step it's select your rootfs partition as this picture shows | Next step it's select your rootfs partition as this picture shows | ||
| Line 75: | Line 75: | ||
We will write the changes to the disk using the '''commit''' menu option and select '''YES''' (confirm the changes). | We will write the changes to the disk using the '''commit''' menu option and select '''YES''' (confirm the changes). | ||
| − | The next step it's update the | + | The next step it's update the file-system structure. |
| − | $ sudo losetup /dev/loop0 igep-nano.img -o $[106496*512] | + | $ sudo losetup /dev/loop0 igep-nano.img -o $[106496*512] |
| − | $ sudo e2fsck -f /dev/loop0 | + | $ sudo e2fsck -f /dev/loop0 |
| − | e2fsck 1.41.14 (22-Dec-2010)<br>rootfs: recovering journal<br>Pass 1: Checking inodes, blocks, and sizes<br>Pass 2: Checking directory structure<br>Pass 3: Checking directory connectivity<br>Pass 4: Checking reference counts<br>Pass 5: Checking group summary information<br><br>rootfs: ***** FILE SYSTEM WAS MODIFIED *****<br>rootfs: 11969/5579872 files (0.6% non-contiguous), 1126338/22491136 blocks | + | e2fsck 1.41.14 (22-Dec-2010)<br>rootfs: recovering journal<br>Pass 1: Checking inodes, blocks, and sizes<br>Pass 2: Checking directory structure<br>Pass 3: Checking directory connectivity<br>Pass 4: Checking reference counts<br>Pass 5: Checking group summary information<br><br>rootfs: ***** FILE SYSTEM WAS MODIFIED *****<br>rootfs: 11969/5579872 files (0.6% non-contiguous), 1126338/22491136 blocks |
| − | $ sudo resize2fs /dev/loop0 | + | $ sudo resize2fs /dev/loop0 |
| − | $ sudo losetup -d /dev/loop0 <br> | + | $ sudo losetup -d /dev/loop0 <br> |
Now you should see your new partition with your wished new size. | Now you should see your new partition with your wished new size. | ||
Revision as of 12:52, 11 January 2012
Contents
QEMU on IGEP Boards
QEMU is a generic and open source machine emulator and virtualizer.
When used as a machine emulator, QEMU can run OSes and programs made for one machine (e.g. an ARM board) on a different machine (e.g. your own PC). By using dynamic translation, it achieves very good performance.
When used as a virtualizer, QEMU achieves near native performances by executing the guest code directly on the host CPU. QEMU supports virtualization when executing under the Xen hypervisor or using the KVM kernel module in Linux. When using KVM, QEMU can virtualize x86, server and embedded PowerPC, and S390 guests.
QEMU documentation can be found here.
Build QEMU with IGEP support
Download QEMU sources from linaro git repository:
$ git clone git://git.linaro.org/qemu/qemu-linaro.git
Download IGEP support patch for QEMU from this link and after that apply the patch as:
$ cd qemu-linaro

$ patch -p1 < 0001-IGEP_QEMU_support.path
Configure the sources for build with this command:
$ ./configure --target-list=arm-softmmu --prefix=/opt/qemu-linaro
Build the sources:
$ make
Install QEMU:
$ make install
Optionally you can download from here the QEMU binaries, we suggest install it under /opt directory with the right user execution permissions.
Board Emulation
Go to your qemu install directory.
$ cd /opt/qemu-linaro/bin
We provide a QEMU ready image based on Ubuntu/Linaro Nano (Oneric 11.11) image, it can be download from here (first uncompress first).
The image has 2 partitions (you can see the partitions using fdisk -ul command as: fdisk -ul igep-nano.img)
Device Boot Start End Blocks Id System
igep-nano.img1 * 63 106494 53232 c FAT32 LBA (Boot)
igep-nano.img2 106496 1048575 470016 83 Linux (Root filesystem)
Optionally you can mount the partitions in you host PC and modify the content as:
First Partition:
$ mount -o loop,offset$[63*512] igep-nano.img /mnt/tmp
Second Partition:
$ mount -o loop,offset$[106496*512] igep-nano.img /mnt/tmp
Now you're ready for execute the emulator in a console with this command:
qemu-system-arm -M igep -m 512 -clock unix -serial stdio -drive file=igep-nano.img,if=sd,cache=writeback -usb -monitor telnet:localhost:7100,server,nowait,nodelay -device usb-kbd -device usb-mouse
Parameters:
-m : Memory assigned to the Virtualized board in Mega Bytes.
Tips
Resize Rootfs Partition
We will resize our rootfs partition adding 1 GB at end.
First we create a new raw file using qemu-img as:
$ qemu-img create -f raw addon.raw 1G
With addon.raw we concatenate it at end of our image file as:
$ cat addon.raw >> igep-nano.img
Next step it's modify the partition table information. We will use cfdisk utility for modify the information.
$ sudo cfdisk igep-nano.img
Next step it's select your rootfs partition as this picture shows
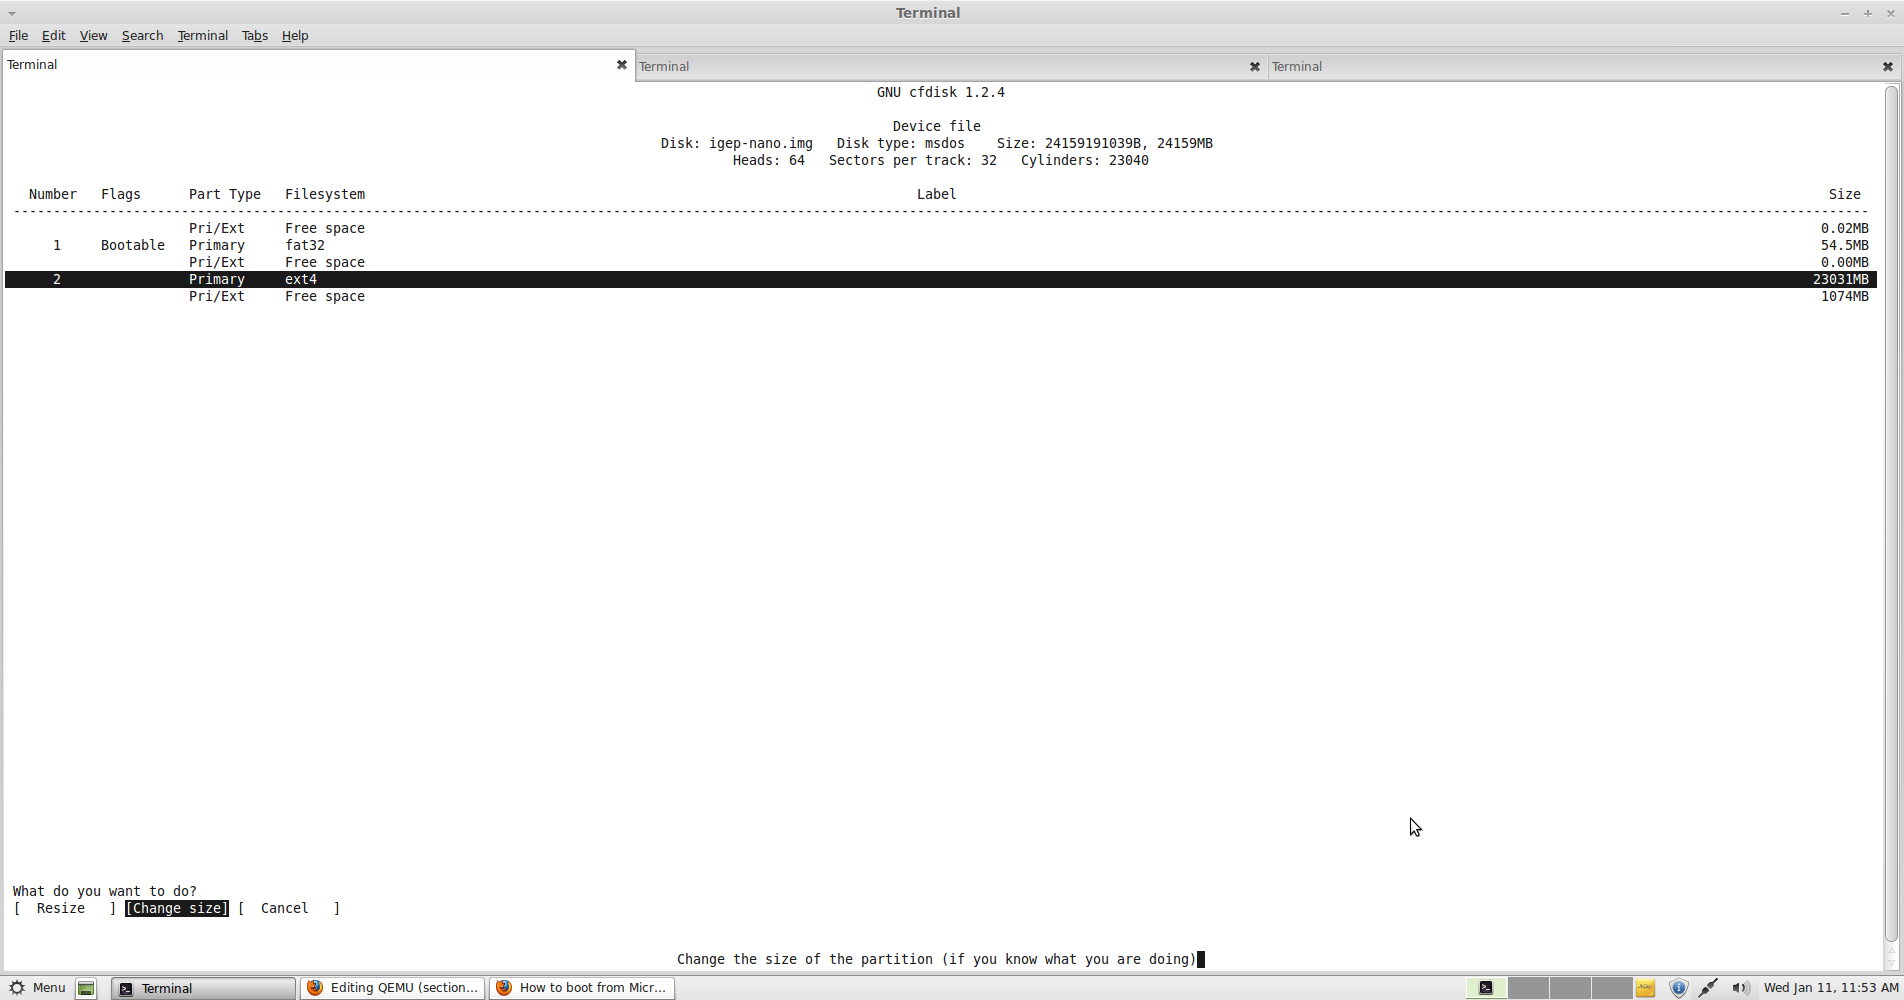
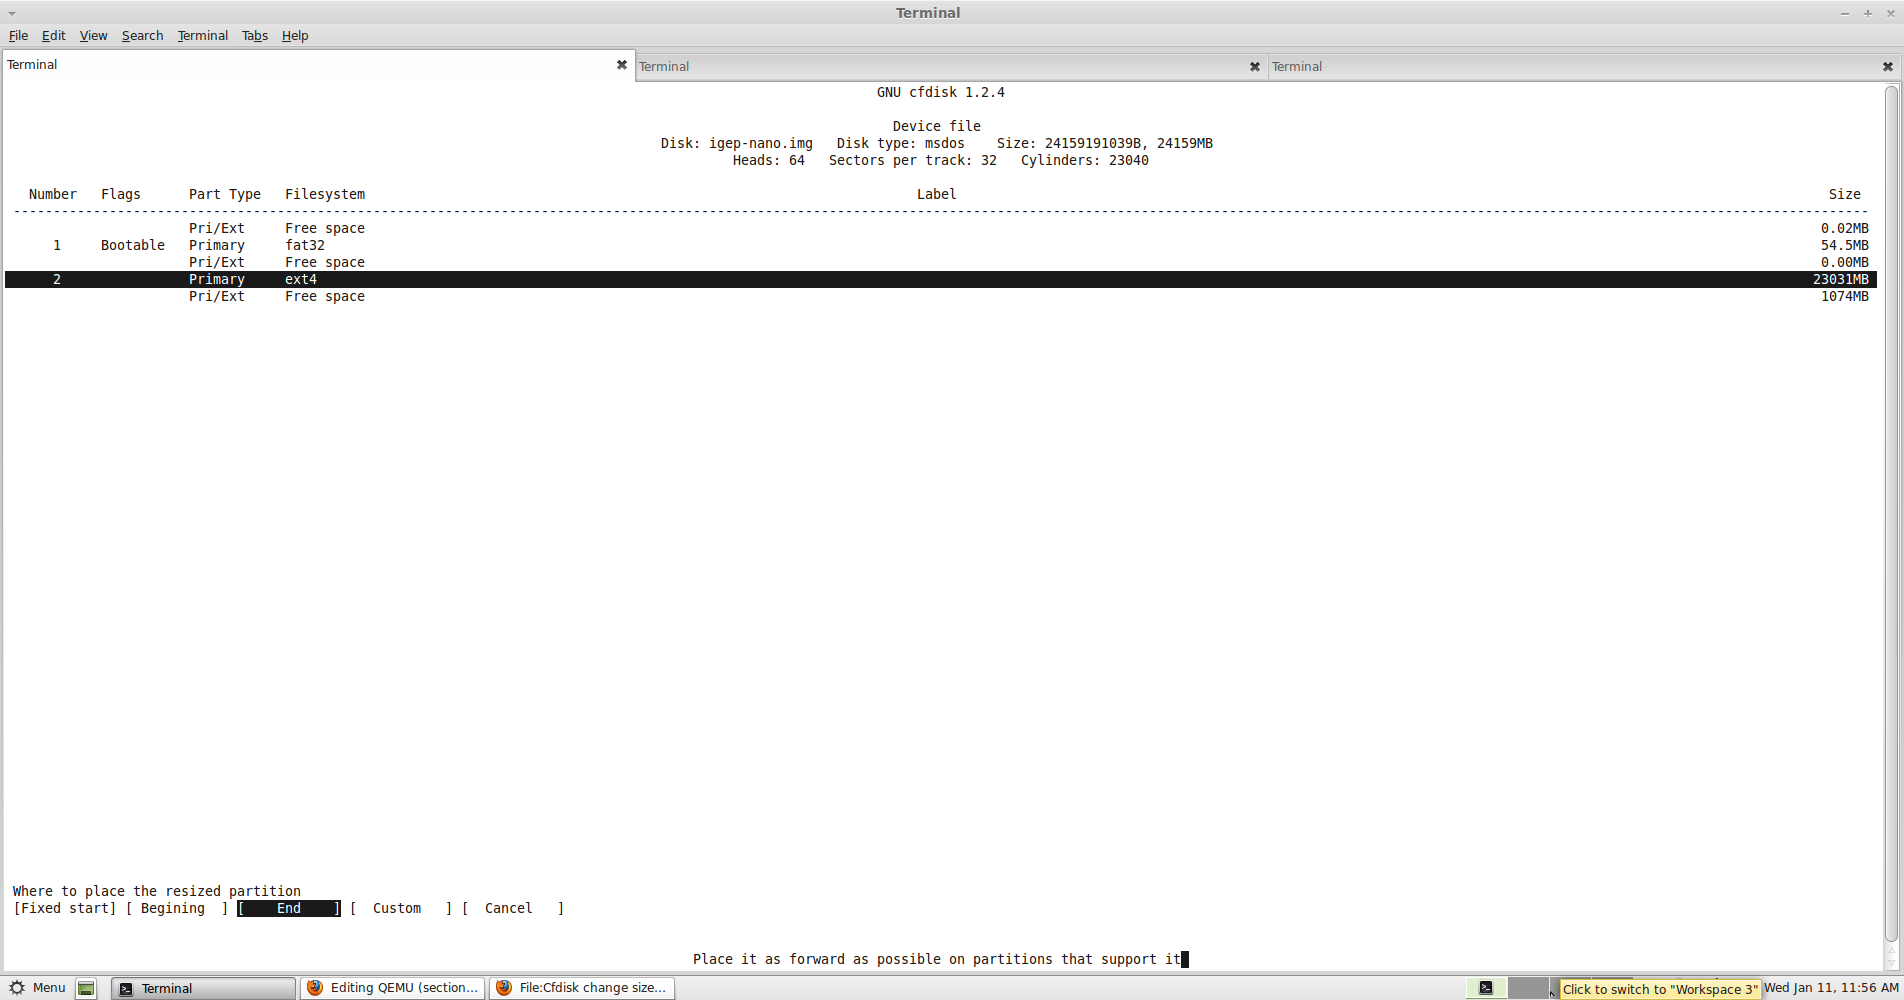
Select the menu RESIZE and select CHANGE SIZE option. Select resize at END. Enter the MAX new size and press enter key.We will write the changes to the disk using the commit menu option and select YES (confirm the changes).
The next step it's update the file-system structure.
$ sudo losetup /dev/loop0 igep-nano.img -o $[106496*512]
$ sudo e2fsck -f /dev/loop0
e2fsck 1.41.14 (22-Dec-2010)
rootfs: recovering journal
Pass 1: Checking inodes, blocks, and sizes
Pass 2: Checking directory structure
Pass 3: Checking directory connectivity
Pass 4: Checking reference counts
Pass 5: Checking group summary information
rootfs: ***** FILE SYSTEM WAS MODIFIED *****
rootfs: 11969/5579872 files (0.6% non-contiguous), 1126338/22491136 blocks
$ sudo resize2fs /dev/loop0
$ sudo losetup -d /dev/loop0
Now you should see your new partition with your wished new size.


